

Google initially announced its authorship markup efforts at the 2011 SMX Advanced conference, and yet, many website owners and entrepreneurs have still failed to take the necessary steps to bring these potentially powerful benefits to their own businesses.
In order to help more website owners take advantage of this technique, I’ll first cover what Google+ authorship is and how it can improve your online business results, before diving into more detailed instructions on how to implement this strategy across your various Web properties.
Let’s get started!
First of all, even if you don’t know what Google+ authorship is, you’ve probably seen evidence of the technique in action in the Google search results:

Two of the results in the above SERP (generated by searching for Google+ iPad) feature Google+ authorship, while two of the listings are displayed in Google’s traditional style.
The two listings that feature images and author information have been correctly set up with Google’s “rel=author” tags. Because the owners of these sites have provided Google with additional information on their on-site authors, Google is able to enhance their listings within the SERPs to include author images, author names, Google+ Circle inclusions, and other sites to which the author has contributed.
The traditional Google listings, on the other hand, don’t feature this information, as they haven’t been marked up with appropriate authorship information. The result isn’t just listings that aren’t as attractive as those with “rel=author” tags. These unmarked results also experience much lower click through rates (CTR) than their updated neighbors.
In a case study carried out by Catalyst Search Marketing, adding authorship data and other types of rich snippets to a sample site increased search clicks by 150 percent throughout the one-month testing period:

Pretty cool, right?
Depending on the type of website you run and the number of authors that contribute to your site blog, setting up Google+ authorship can be downright simple. In the next section of this article, I’ll cover a few different approaches you can use to set up the “rel=author” tag correctly, depending on the platform and configuration of your website.
Option #1: Websites Built on WordPress
If your website runs on WordPress, you’re in luck. Setting up Google’s authorship snippets can be easily accomplished by installing the Yoast SEO for WordPress plugin, which will automatically add the fields necessary to validate content ownership between your site and your Google+ profile.
Once the plugin is installed, head over to Google+ and grab the direct link to your Google+ profile (or, if you haven’t yet set up a Google account, take the time to do so now). Your profile link should look something like this: https://plus.google.com/u/0/111418446941152662084/.
While you’re in your account, take a second to update your profile picture to a clear, engaging headshot. Whenever Google detects your content in the search results, it will add your profile image as your author headshot, and you’ll find that logos, cartoons, and other similar images will be rendered too small to be seen clearly. A picture of your face will also perform much better in terms of boosting click through rates from the SERPs, as people are naturally drawn to other faces.
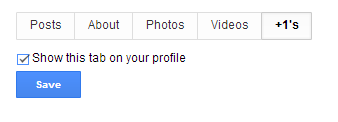
In addition, to use the Yoast SEO for WordPress plugin, you’ll need to make sure your “+1s” are visible within your Google+ profile. To do this, navigate to the “Profile” tab within your account, click “Edit Profile” and then check the box that appears under the “+1’s” item on your navigation bar:
Save your changes and then head back to your WordPress dashboard. Once inside, add your Google+ profile link to the Google+ area of your user profile, as shown below:
Add the profile link to the user profile of every author that contributes to your website. Once this is complete, articles that are published will automatically contain the necessary “rel=author” markup to trigger featured author benefits within the Google search results.
Option #2: HTML Websites
If your website runs on straight HTML, you can still get all the benefits of Google’s authorship markup, though you’ll need to take a few extra steps to get there.
To start, add your profile link to the following piece of code and paste the finished product into the <head> section of any page you’d like to receive author benefits for in the natural SERPs:
<a rel=”author” href=”https://plus.google.com/u/0/111418446941152662084/”>
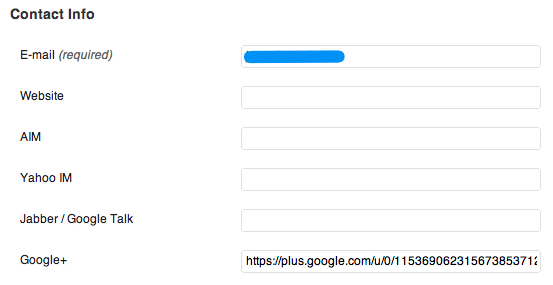
After this is complete, log back into your Google+ profile and click the “Edit Profile” button found on your profile page. Make sure the “About” tab is highlighted and scroll down until you see the “Contributor to” section. Edit these fields to add the name and URL of your website and then click to save your changes.
Once you’ve setup all of your code, head over to Google’s Rich Snippet Testing Tool and type in your website’s URL. If your “rel=author” integrations have been structured correctly, you should see a sample search preview appear. If not, Google will let you know that errors have occurred in the setup process that you’ll need to sort out.
Option #3: Guest Posts on Other Sites
Either of the first two options discussed in this article will ensure that content you host on your own website is marked up with the appropriate code needed to secure featured author benefits in the SERPs. But what happens if you guest post on other websites? How can you claim your content when it’s published on a site you don’t control?
In some cases, the owner of the site you’re posting from might set you up as a user. If this occurs and the webmaster is using the Yoast SEO for WordPress plugin described above, you may be able to have your Google+ profile link added to your user profile in order to set up authorship automatically.
But if this isn’t the case, you can still take matters into your own hands. As most guest article hosts allow authors to include a linked bio at the end of their articles, simply create a link that points back to your Google+ profile using the same structure shown above in Option #2.
For example, your finished bio might look like:
“Sujan is the owner of Single Grain Digital Marketing. You can learn more about him on his personal blog or by connecting on <a rel=”author” href=”https://plus.google.com/u/0/111418446941152662084/”>Google+</a>.”
After submitting your guest post, you’ll need to head back over to your Google+ profile and add the name and home page URL of the site that’s publishing your guest post to the “Contributor to” section of your profile (as described above). Once Google determines that this connection is valid, you should see your author headshot and other metadata elements appear in the natural SERPs as soon as two to three weeks after you’ve completed your setup.
In the past, the process of setting up authorship in order to secure featured benefits within the SERPs was a much more complicated process. Fortunately, at the request of confused webmasters, Google has simplified the process, making it easier to set up “rel=author” tags in just a few steps on any type of website. As a result, there’s simply no excuse not to head out and claim these extraordinary benefits for yourself by setting up Google+ authorship today!
