

If you’ve used Google Ads for any amount of time, you’ve probably used Google Ads Editor. It’s a desktop application that’s invaluable for managing campaigns and making bulk changes.
So how can you make the best use of this tool and all of the features it entails?
In this guide, you’ll find everything you need to get started with Google Ads Editor, use basic features, create new builds offline, and more.
What is Google Ads Editor?
Google Ads Editor is an offline editor for your Google Ads accounts.
Instead of making changes directly in the online UI, you can make them offline in Editor and then post in bulk.
Advertisers can also work across multiple accounts simultaneously using Editor.
How Google Ads Editor Got Started
In the early days of Google Ads (formerly called Google AdWords), all we had was the online interface.
I started managing Google Ads campaigns as an in-house PPC manager in 2002, and it was so successful for us that we quickly expanded our account to represent all our products.
Managing so many campaigns quickly became unwieldy. Any changes we made went live immediately – there was no way to review the work before it became active.
And there was no way to make bulk changes. Everything had to be edited by hand, one change at a time.
We actually hired an intern to help us make pricing updates in our ads.
In early 2006, Google Ads Editor (then called AdWords Editor) rolled out.
Search marketers everywhere rejoiced. Finally, bulk editing was going to be a lot easier.
Why an Offline Editor?
It turns out that Google Ads had been using a version of Editor internally for a while. Advertisers could send bulk changes to their reps, and the reps used Editor to make the changes.
Google finally realized it would be more efficient if advertisers could make bulk changes themselves.
Editor was a boon for advertisers as accounts grew more complex.
Getting Started With Google Ads Editor
To use Google Ads Editor, first, download it from Google Ads.
Once you download the tool, you’ll be prompted to log in and download your Google Ads accounts from your My Client Center (MCC).
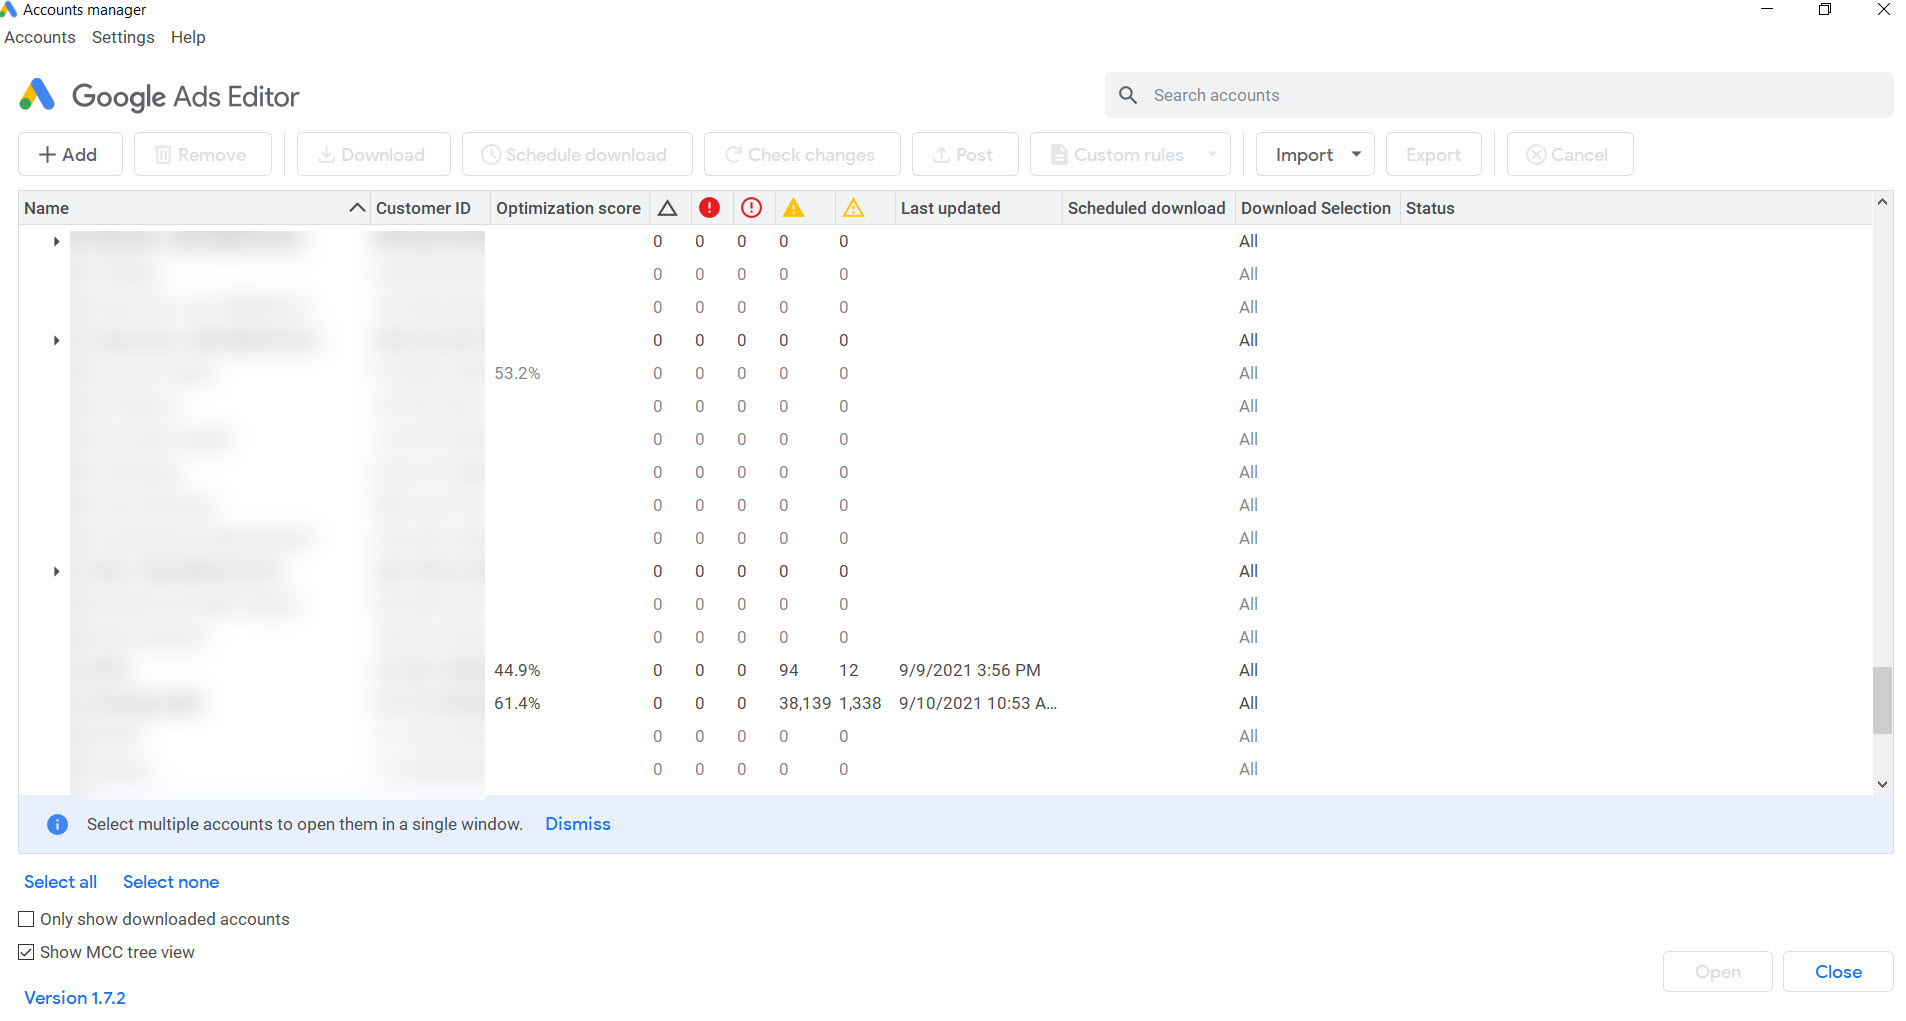
The Accounts Manager shows all the accounts in your MCC, along with an optimization score, stats on the last date updated, and any errors.
Simply select the account you want to work on and click “Open” to download it into Editor.
Using Google Ads Editor: The Basics
Once the account is downloaded, you’ll see the main screen:
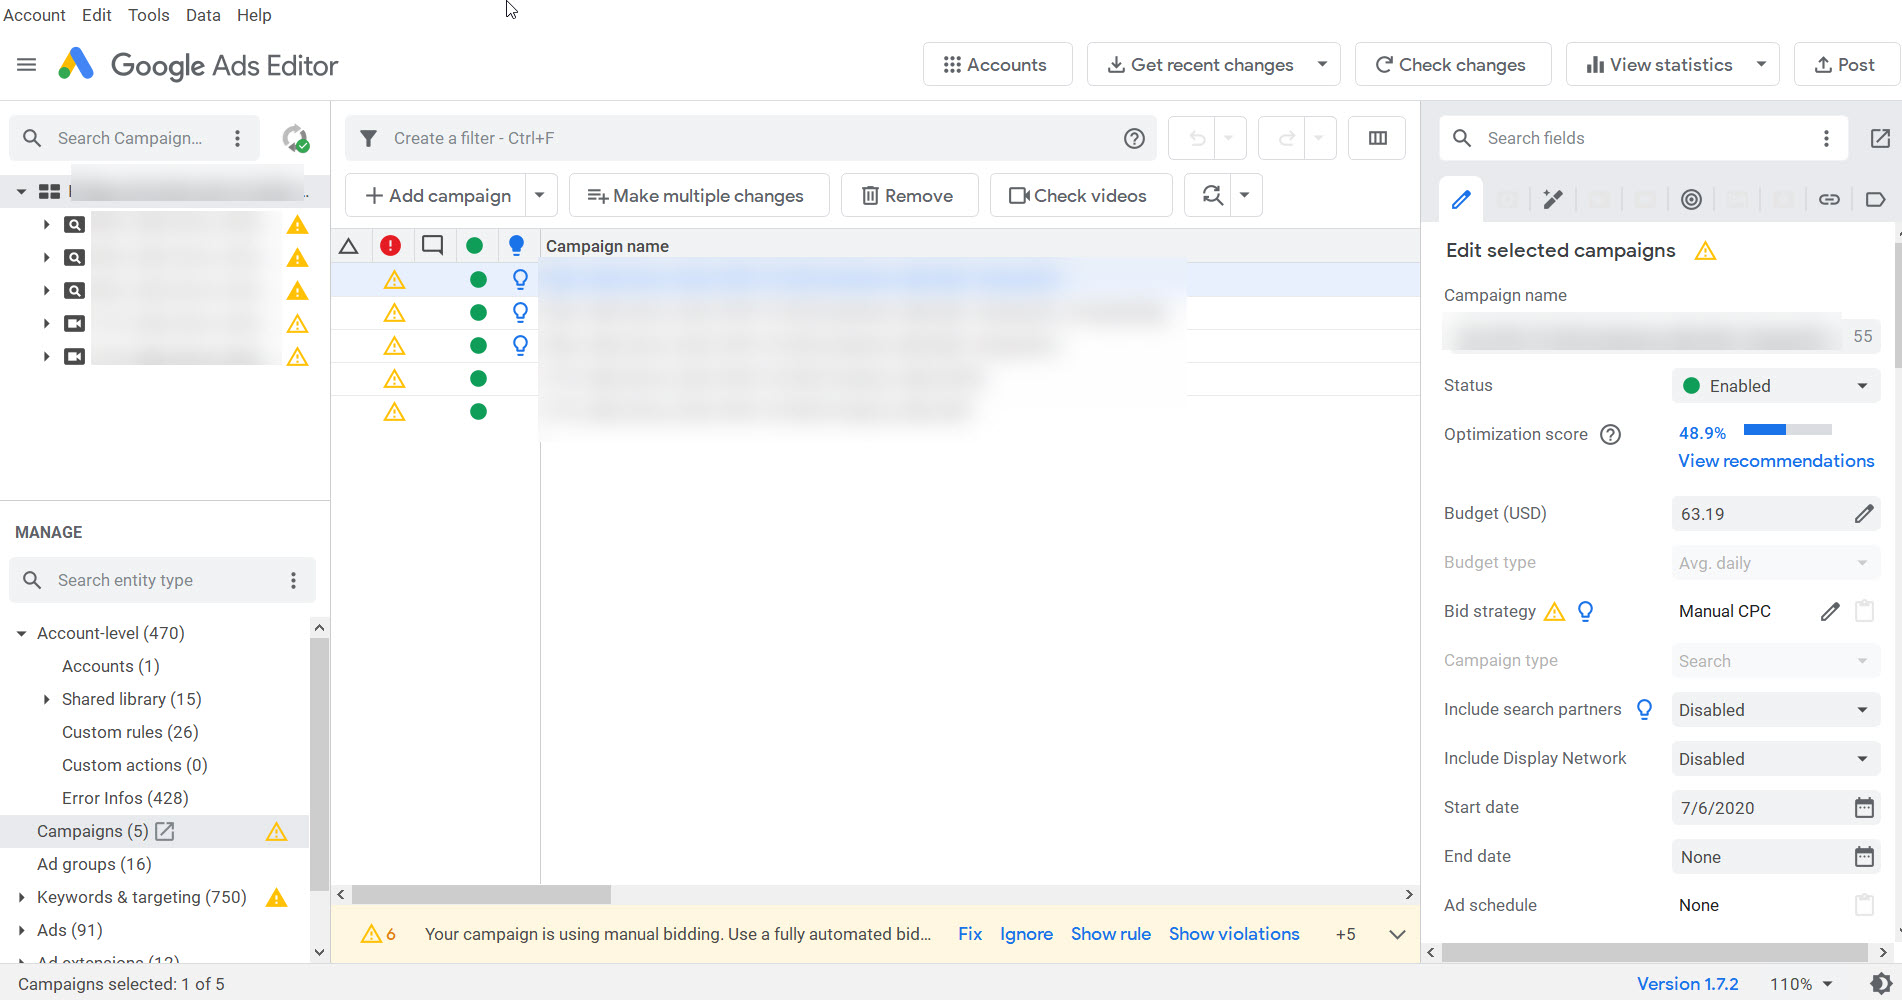
One of the things I love about Editor is you can see your entire account at a glance, and easily expand or collapse various elements like campaigns, ad groups, ads, and keywords.
In the left nav, you’ll see all your campaigns, along with an icon indicating the campaign type:
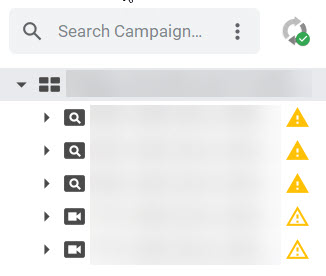
The magnifying glass indicates a search campaign, and the video camera indicates a YouTube campaign. There is also an icon for display campaigns.
You can search for a campaign in the left navigational menu by typing a search term or campaign name into the Search Campaign box at the top.
There’s also an icon to tell you whether the account has been synced.
Syncing is important to make sure you’ve imported any changes made directly in Google Ads into Google Ads Editor.
We’ll talk about syncing later in this article.
To expand a campaign and view its ad groups, simply click on the arrow to the left of the campaign name:
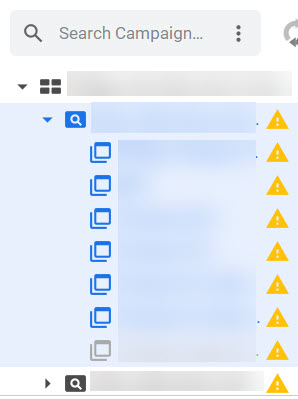
Now you can see all the ad groups within the campaign.
Below the top left menu is where you can find other elements of your Google Ads account, such as keywords, ads, targeting, etc.:
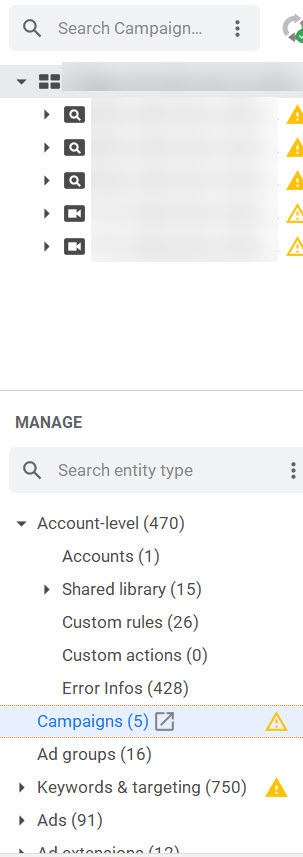
Selecting a campaign or ad group in the top left will change the information in the bottom – you’ll just see info for the selected campaign.
This account has a total of five campaigns, 16 ad groups, 750 keywords and targeting, and 91 ads.
When you select an element from the lower left, you’ll see details in the center and right-hand section of Editor:
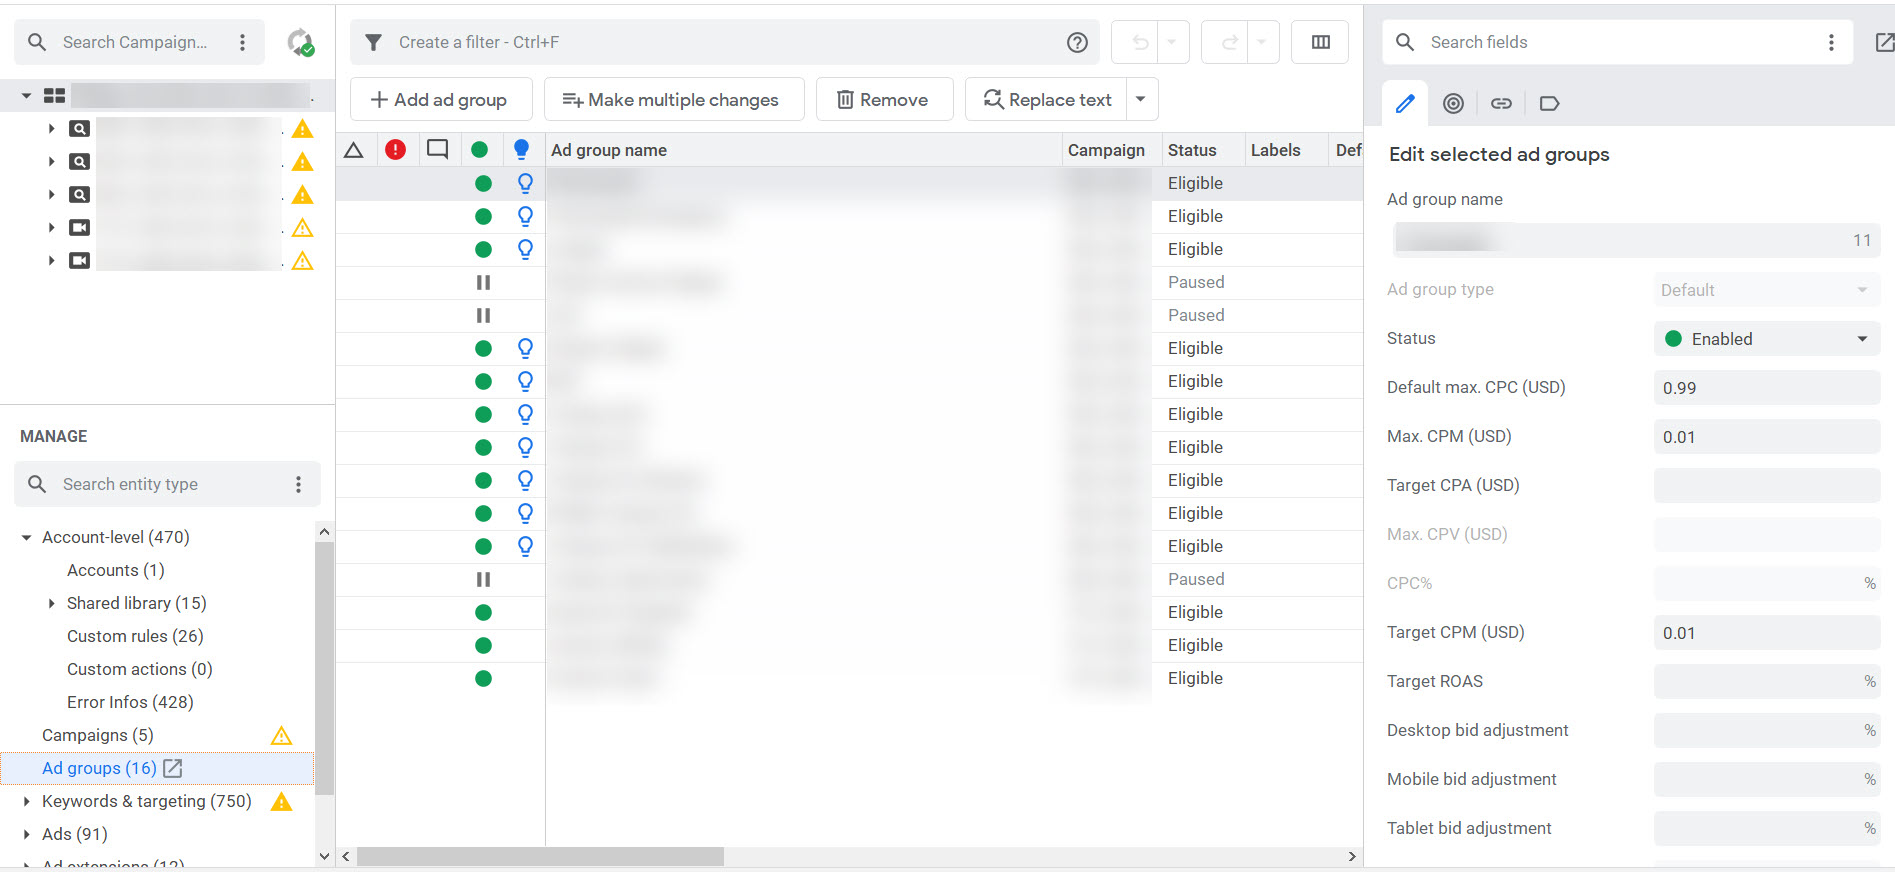
In this example, I’ve selected “Ad groups” for the entire account.
In the center, I can see all the ad groups, along with their status (green dot for active, hash marks for paused).
On the right, I can select an ad group and make edits to any of the fields shown.
Selecting multiple elements (in this case, ad groups) allows you to make bulk changes all at once.
Let’s say I wanted to update all the bids for every ad group in the entire account to the same amount. I simply select all the ad groups in the center, and then make the change in the right:
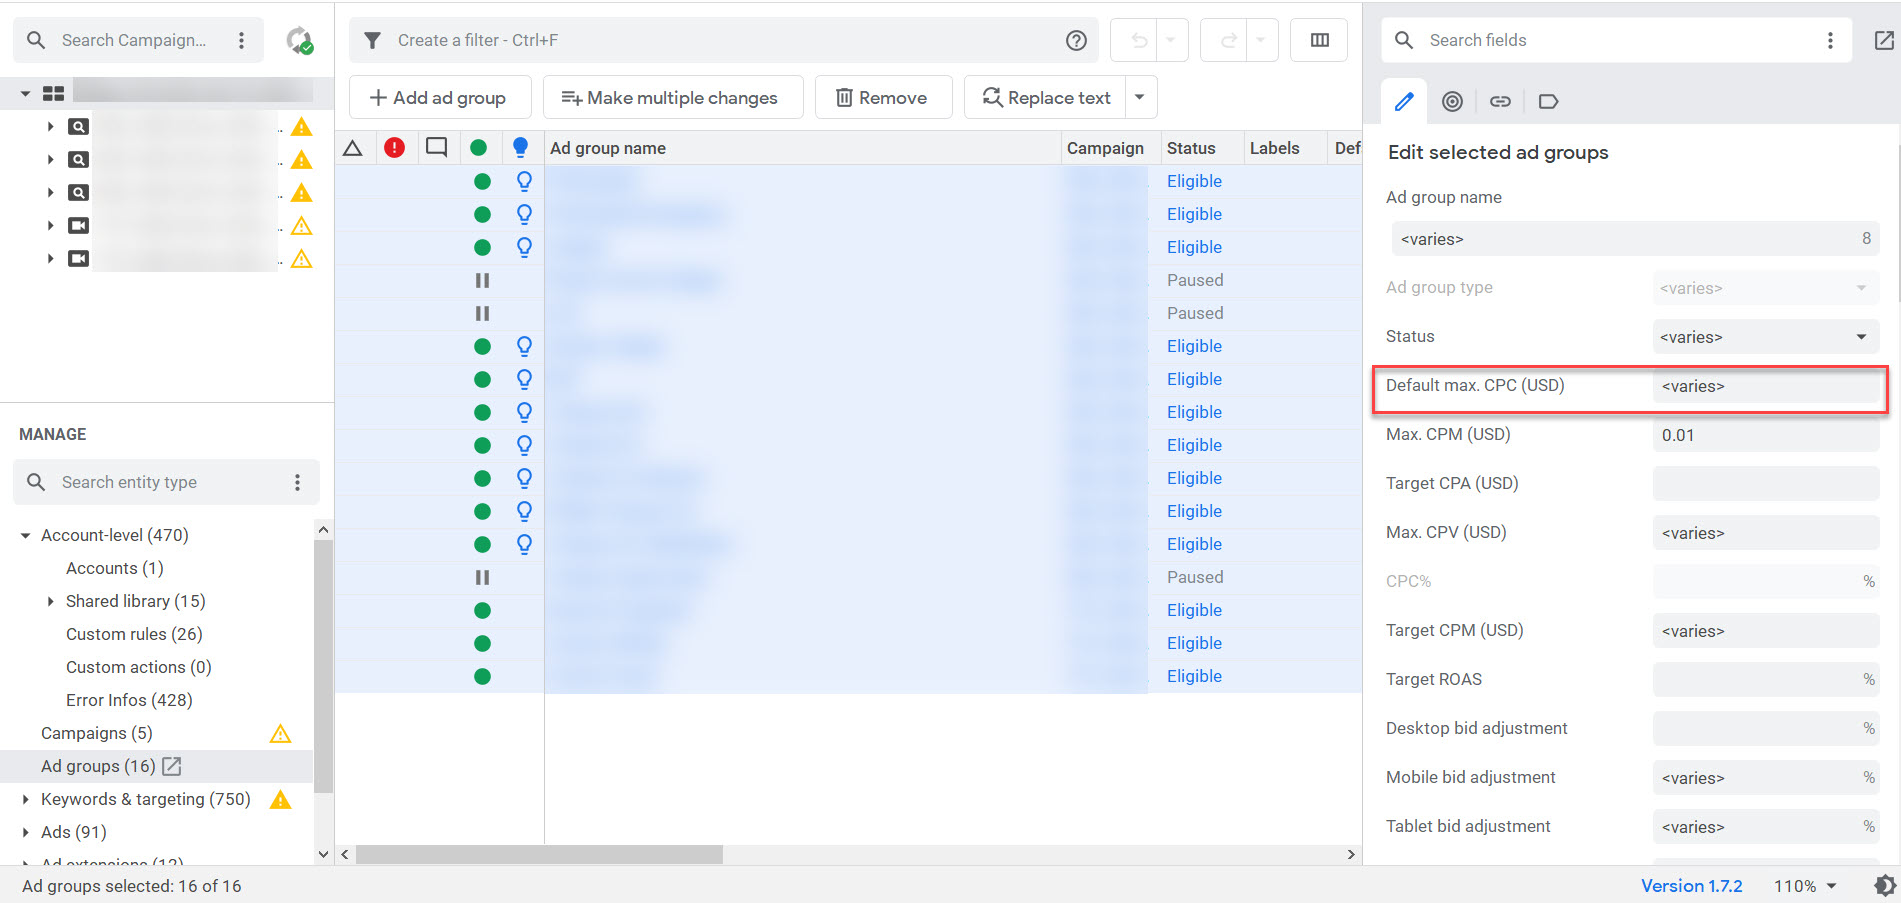
Then enter the desired bid in the Default Max CPC box shown above, which will update all the ad group bids to the same amount.
You can make a myriad of bulk edits this way.
Let’s say I wanted to update all the final URLs for every ad in each campaign to the same URL.
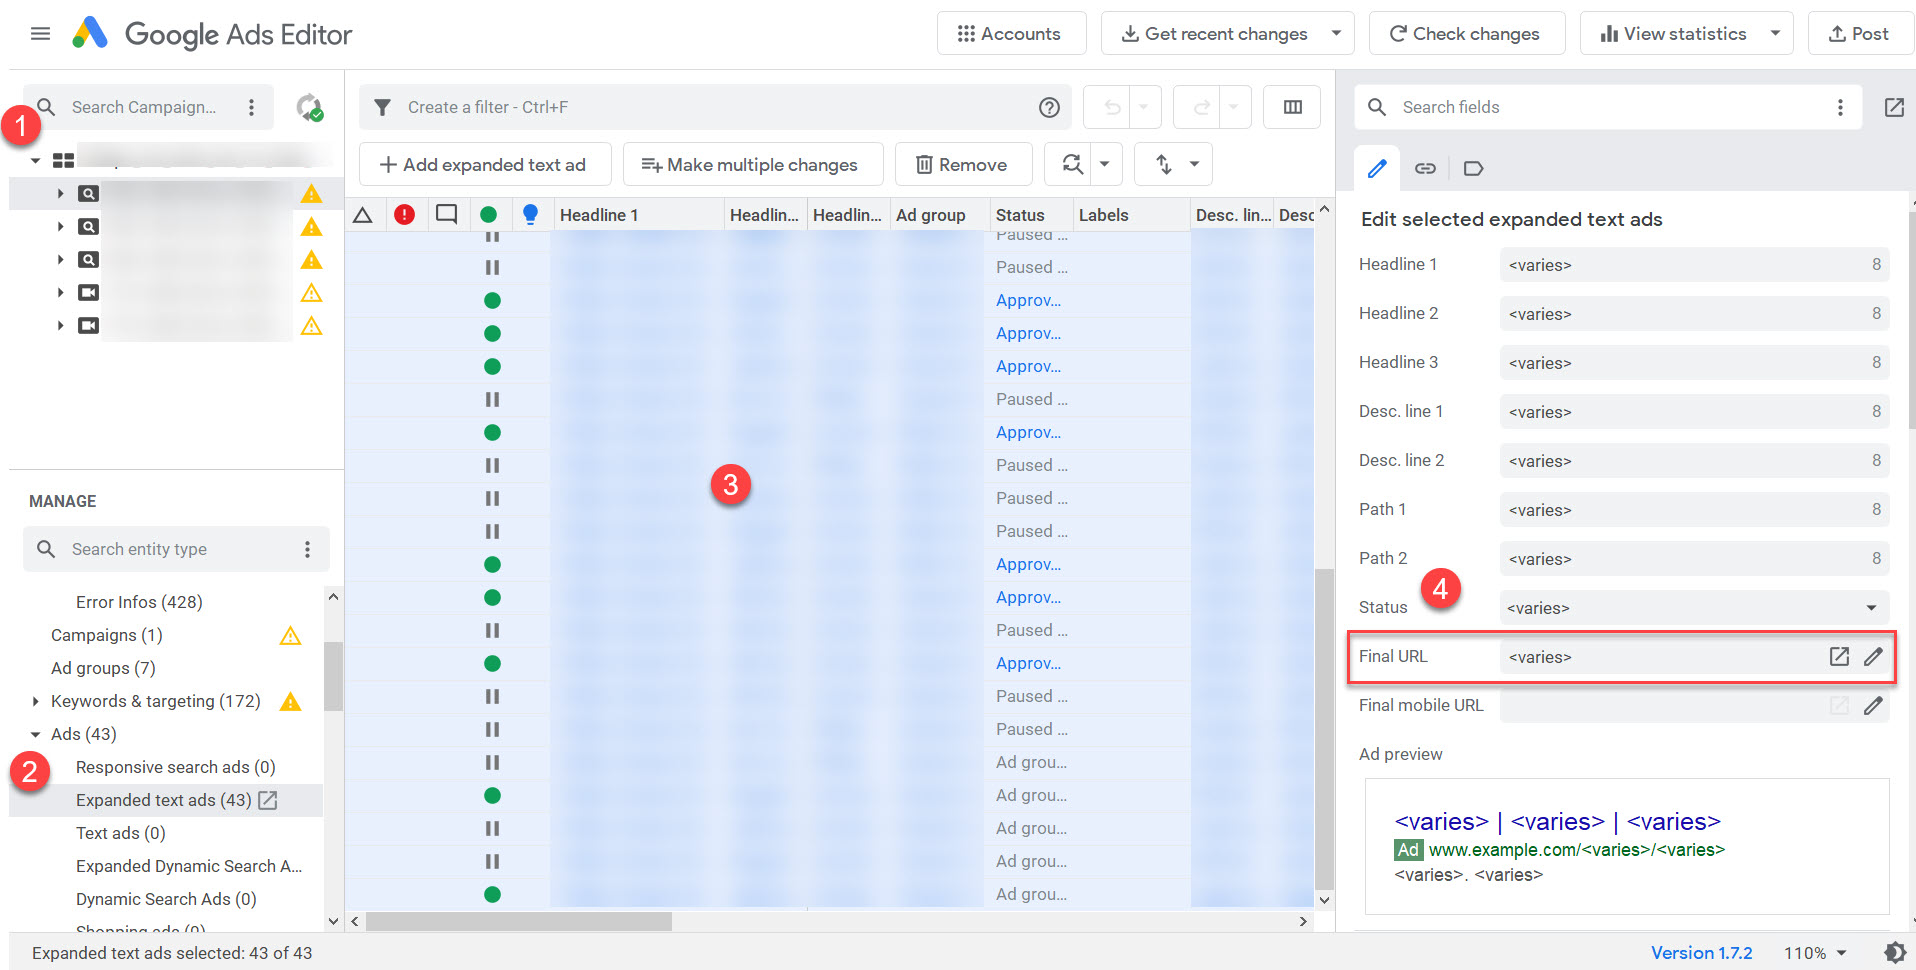
First, select the campaign in the left nav, as seen in number one, above.
Next, select Ads and then the type of ads you want to update in the lower-left nav, as seen in number two. (Note that you’ll need to edit each ad type separately: RSA, ETA, Dynamic Search, etc.)
Then, select all the ads in the center section, as seen in number three.
Finally, change the Final URL to the new URL in the right nav as seen in number four.
Posting Your Changes
You may be reading this and thinking, “I can do all of these things in the online Google Ads UI. Why would I use this Editor?”
The difference is that changes made in the online UI go live immediately.
As mentioned earlier, the great thing about using Google Ads Editor is that your changes are all made offline. This allows you to check your work for errors before it goes live.
We’ve all made a change that we’ve had to go back and undo – and sometimes this is a daunting task. Using Editor greatly reduces the chance for error.
Training New Hires
I love using Editor to train new hires. Not only is it easy to see and understand the account structure in Editor, but it helps with QA-ing the work of a trainee.
Changes made in Editor live on the user’s local device until they’re posted to Google Ads. They’re not visible to other users of the Google Ads account.
If you’re working alongside the trainee in person, you can physically look at their changes in Editor before they’re pushed live.
If you’re training someone remotely, you can have them upload their changes in a paused state, import them to your local Editor, and check them – and then change the status to Active.
To post changes you’ve made in Editor, click Post in the upper right-hand corner, and then Post in the dialog box:
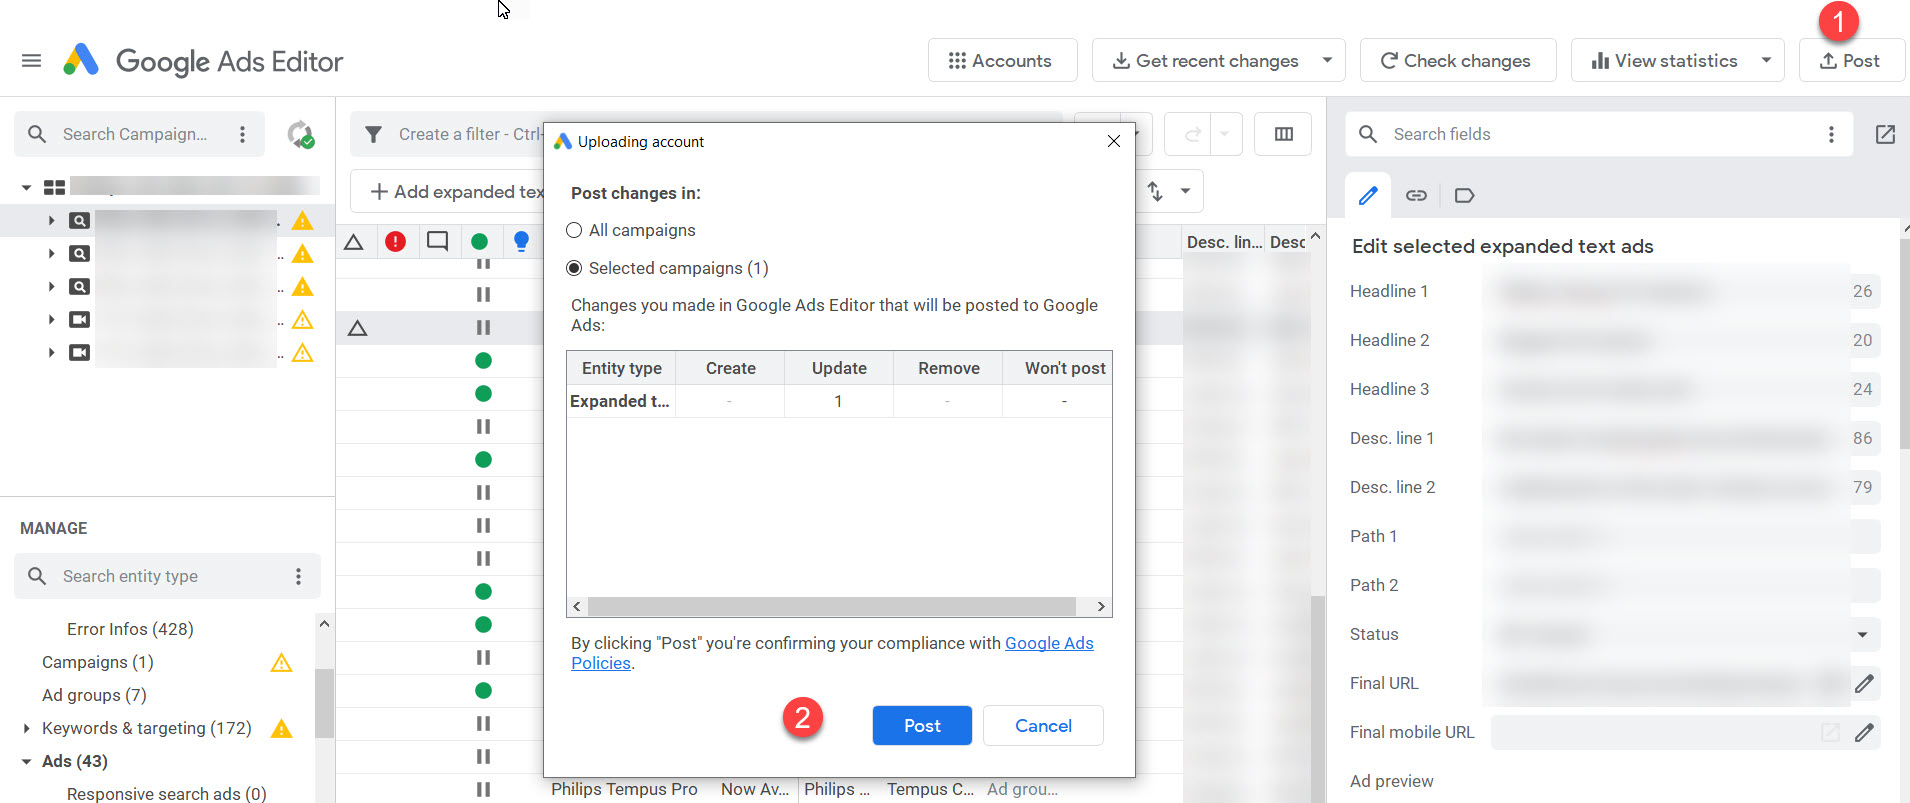
Be sure to select All Campaigns or Selected Campaigns to post the correct changes.
Need to undo a change? There’s an Undo button above the center section:

Just be sure to Undo before posting the changes; once changes are posted, they can’t be undone from Editor.
View and Edit Settings
Google Ads Editor is great for viewing and editing campaign settings. I talked about using Editor to audit settings in an earlier article, 10 Tips for a Fresh Start After a Google Ads Account Takeover.
Filtering in Google Ads Editor
If you work in large Google Ads accounts, it may be overwhelming to look at the entire account all at once, especially if there are a lot of paused campaigns.
Here’s what I see when I first open one of our enterprise accounts:
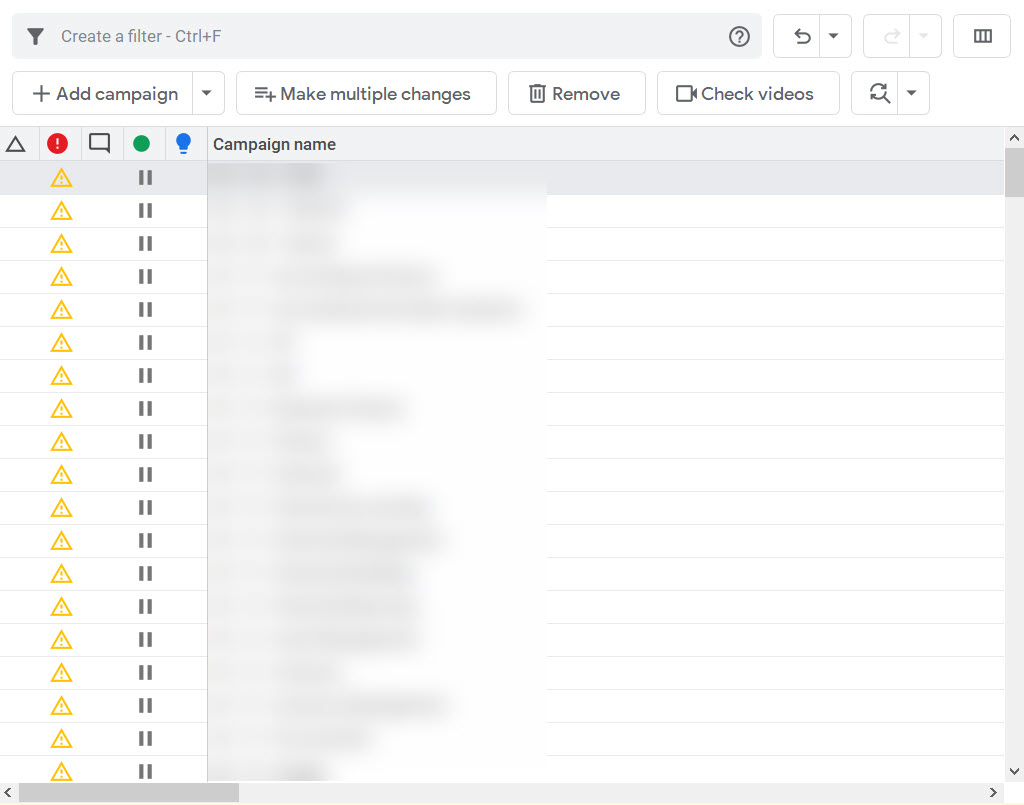
The entire screen is filled with paused campaigns. Not helpful if I’m trying to work on active campaigns.
That’s where filters come in.
You can create a filter for just about anything:
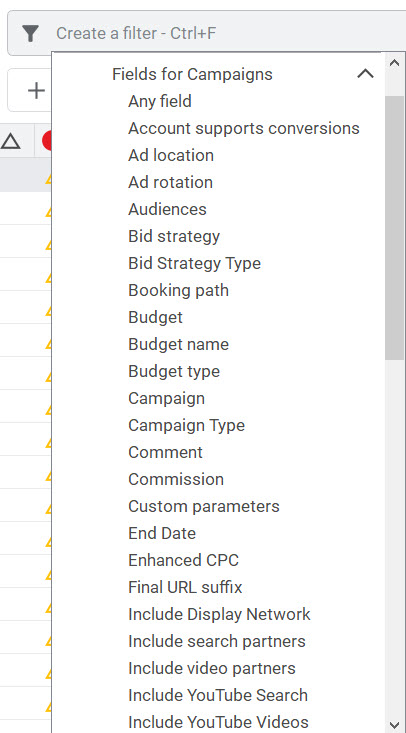
That’s only through the I’s in the alphabet!
One filter I use a lot is a filter that shows me only enabled entities: campaigns, ad groups, keywords, etc.:

This filter is invaluable for working in large accounts with a lot of paused entities.
To create a filter, select your options and click the Save icon:

Import Statistics Into Google Ads Editor
We’ve covered a lot of ways to view your Google Ads account and make changes.
At this point, you may be thinking, “This is all fine, but if I’m working on my account, wouldn’t I want to see performance data?”
Yes, you would, and yes you can!
Google Ads Editor has a View Statistics feature that allows you to import performance stats.

None is selected by default, but when you click on Get statistics, you have several options:
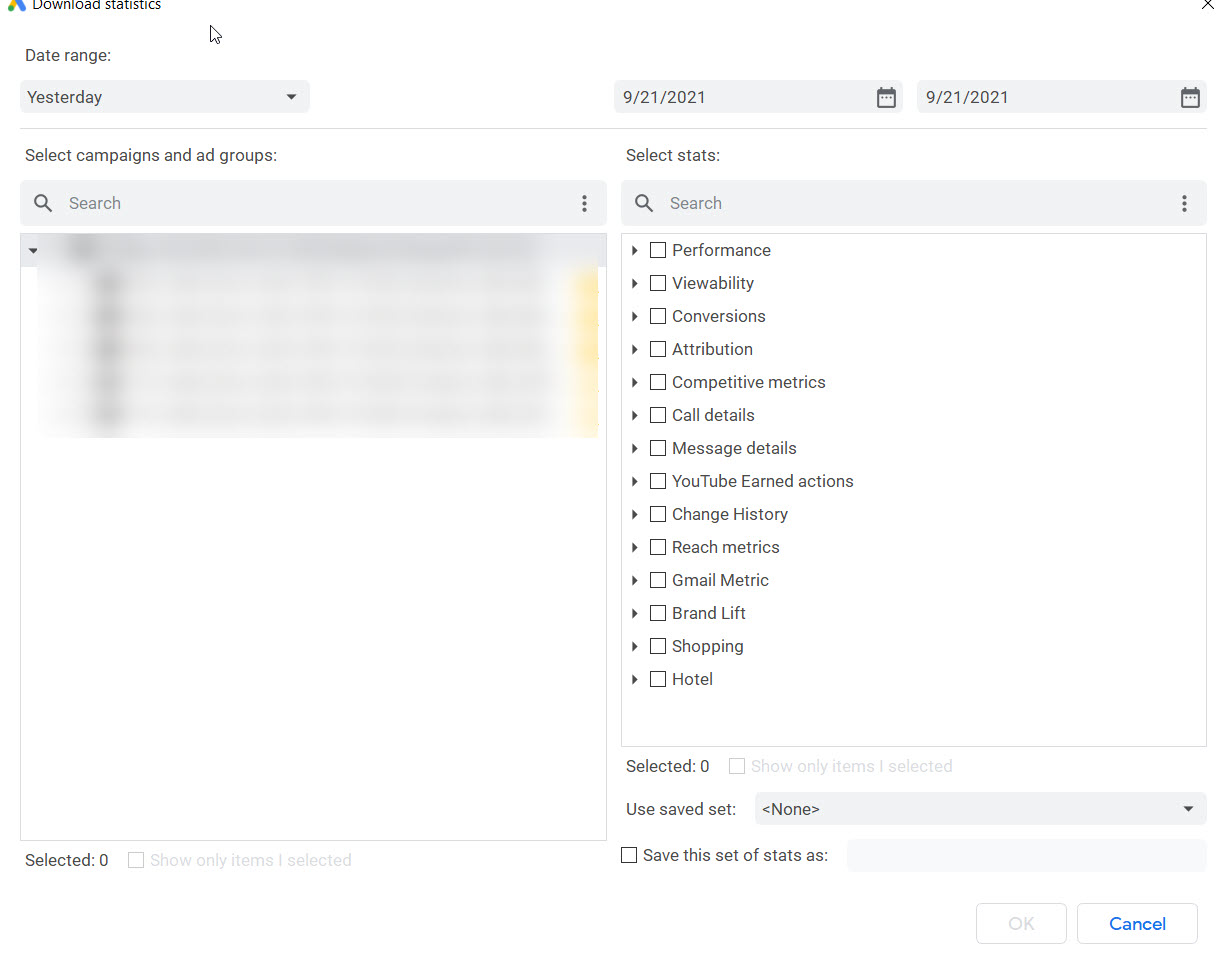
You can choose your date range at the top left, and then select whatever statistics you want to view in Editor. You can also save the set of stats to view later.
Viewing stats in Google Ads Editor allows you to make optimization decisions, just like you would in the online UI.
Here I’ve selected all the stats in the Performance drop-down:
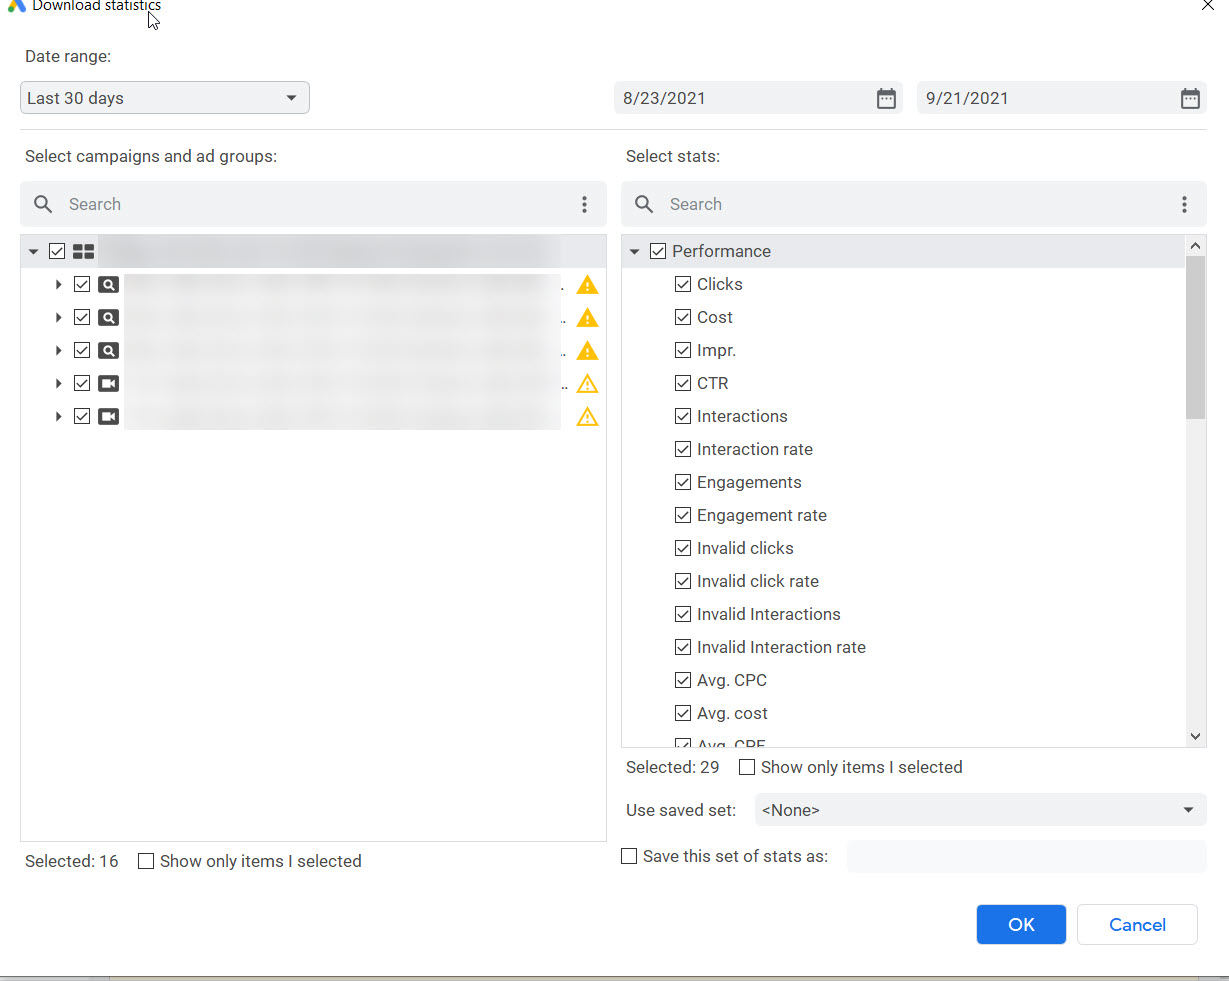
Make sure to check the box next to the campaigns for which you want to view stats, in the left-hand section.
Create New Builds in Google Ads Editor
One of the most useful features of Google Ads Editor is the ability to create new builds offline.
Unlike the online UI, where any uploads go live immediately unless you set their status to Paused, uploads in Editor don’t activate until you post them.
This allows you to check your work and even have someone else check your work before you post.
Many PPC managers use Excel to develop campaigns, ad groups, keywords, and ad copy.
Excel is the ideal tool for campaign development because it’s easy to sort, filter, organize, and measure the length of each field.
Just make sure your Excel sheet has the correct column headings, and you can easily import your new campaigns to Editor.
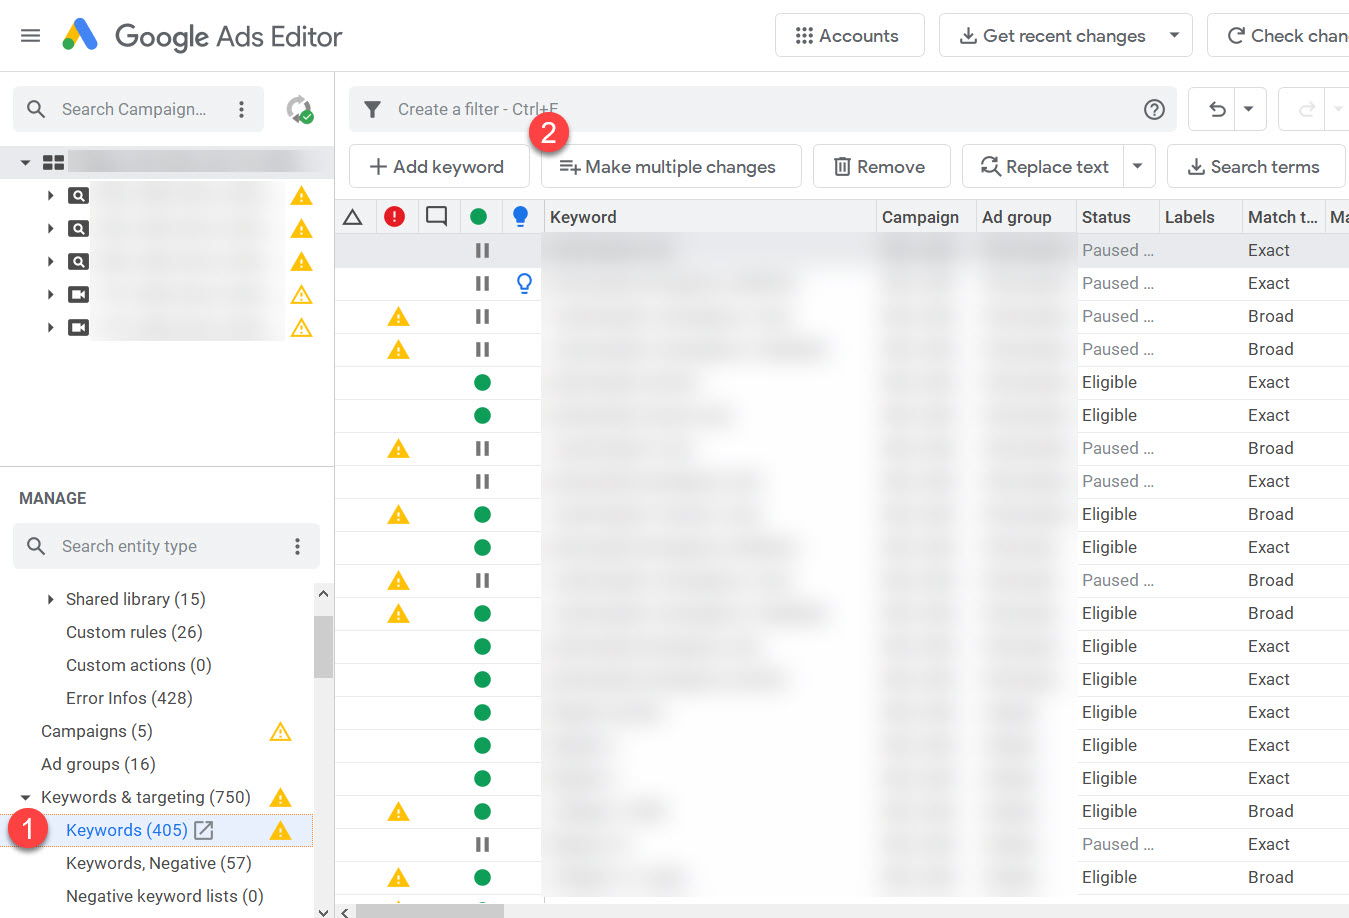
I like to start a new build with keywords. You can create new campaigns and ad groups in Editor at the same time you create keywords.
Here are the column headings I use:

You could also add columns for status, bid, and other relevant fields.
To upload from your spreadsheet, navigate to Keywords in the left column of Google Ads Editor, and then click Make multiple changes.
From there, you can just copy and paste from Excel. As long as your column headings exactly match the entity name in Editor, Editor will pick them up and know what they are.
Make sure My data includes columns for campaigns and/or ad groups is selected, then click Paste from clipboard.
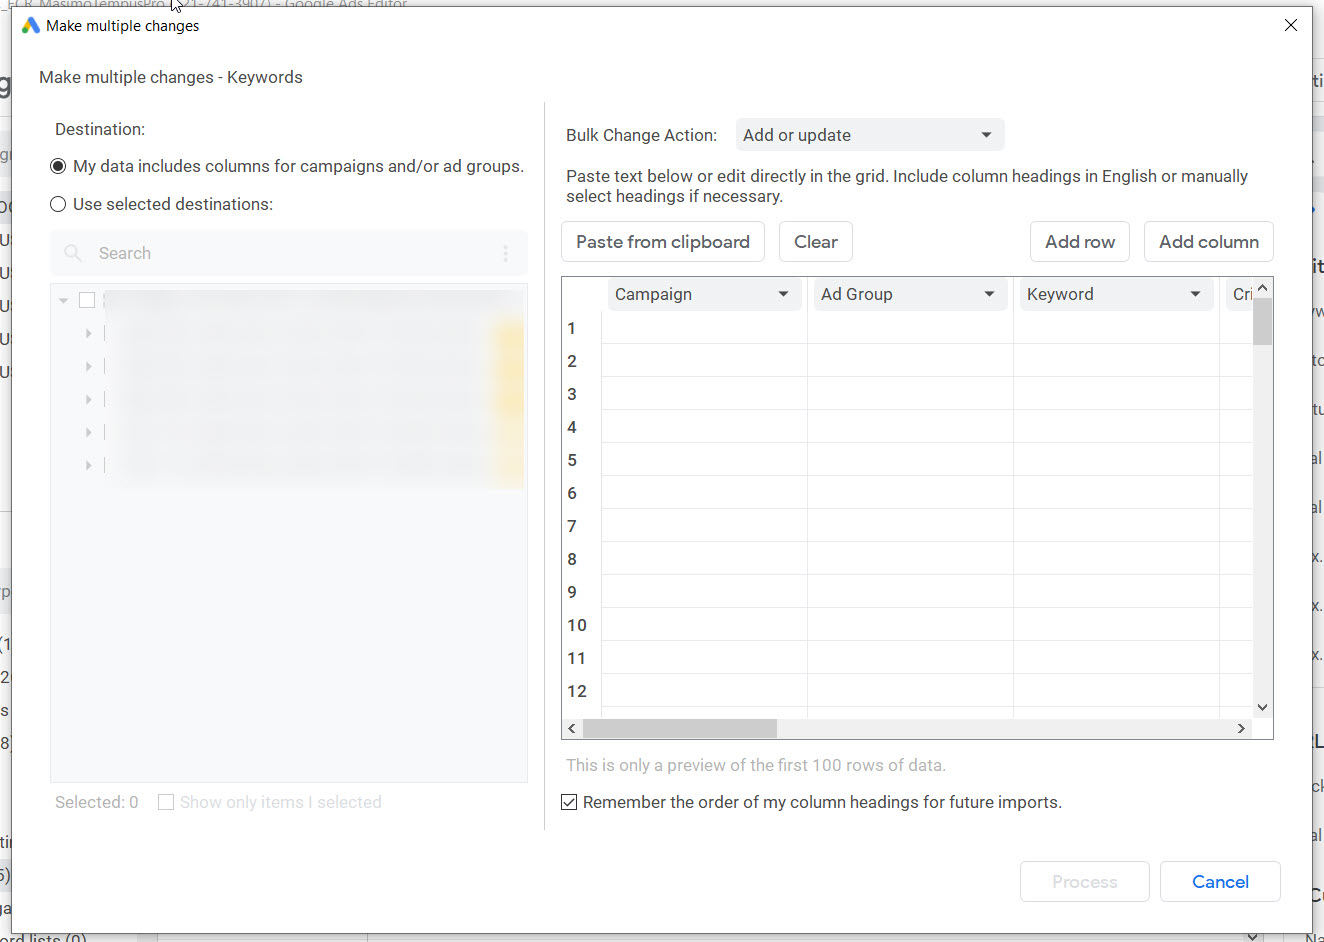
Then check to make sure everything pasted properly and click Process. You’ll have a chance to review your changes before posting them to Google Ads.
You can use the Make multiple changes feature to upload elements to existing campaigns and ad groups, too. There are two ways to do this.
First, you can follow the steps above, using the exact campaign and ad group names in the account. Editor will recognize these as existing and add the new keywords, ads, or other elements to the right place.
Alternately, you can choose Use selected destinations in the upper left of the Make multiple changes menu.
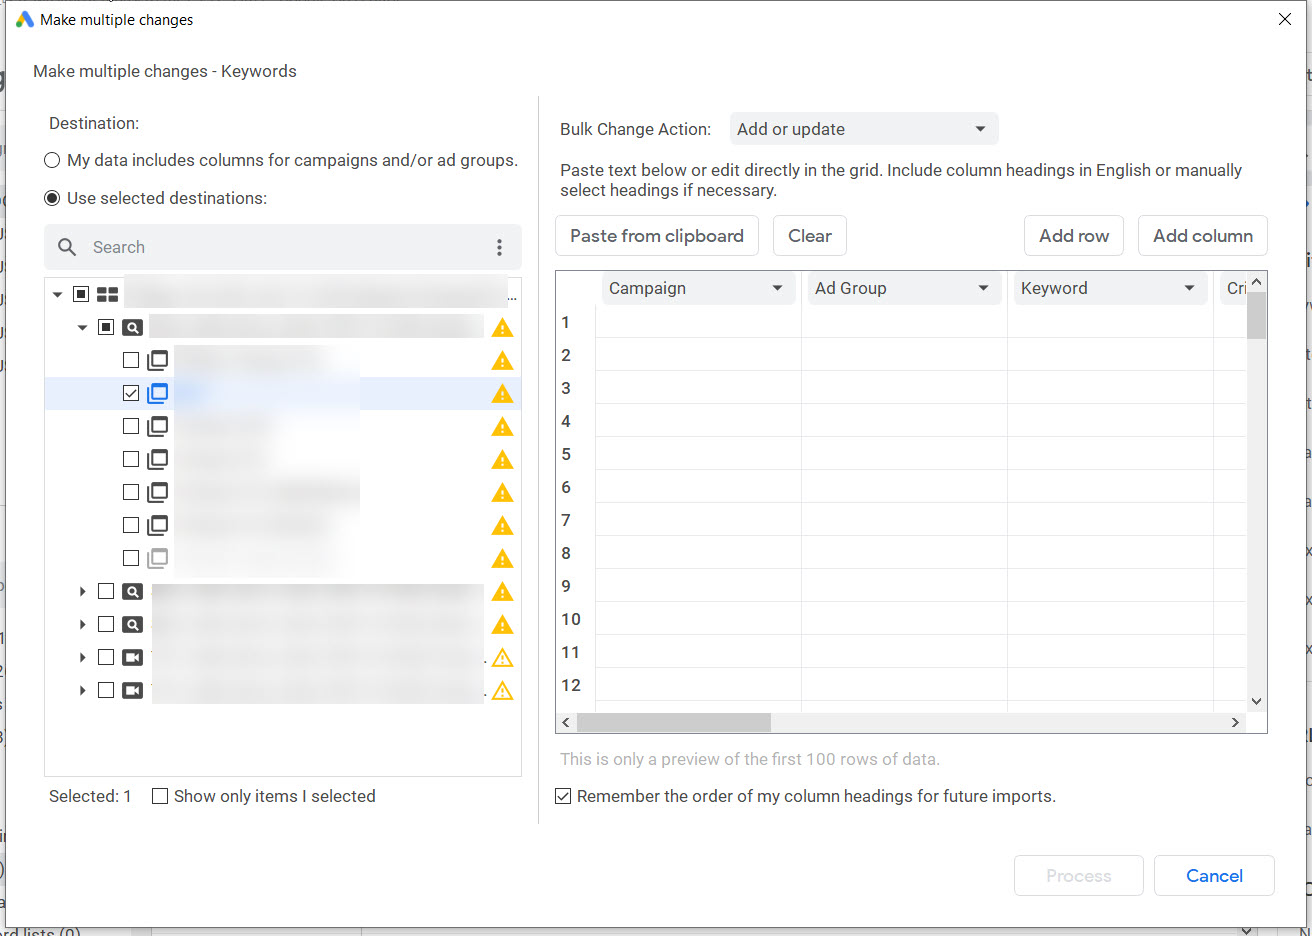
Select the ad group(s) or campaign(s) you want to add elements to, then paste and process.
Google Ads Editor allows you to check your changes prior to posting. You can check for errors and fix them before you post.

Find and Replace
One of my favorite features of Google Ads Editor is the find and replace function.

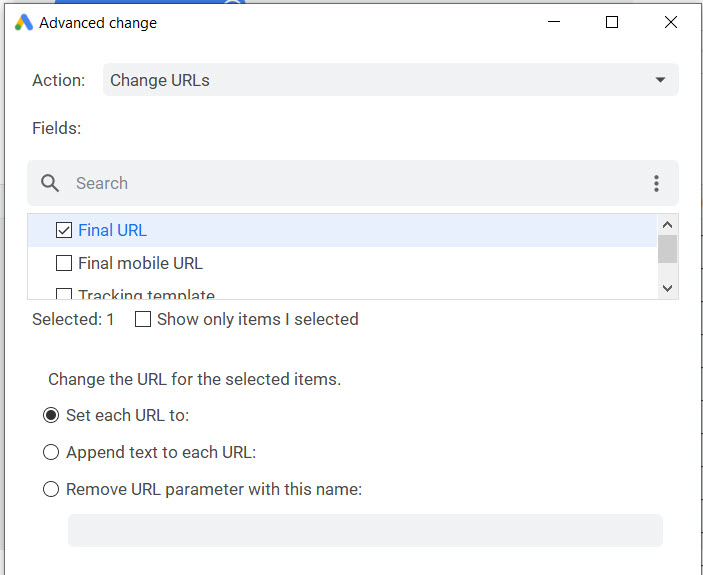
You can replace text, append text, change capitalization, or change URLs.
Replace text is useful if you need to change a word or phrase in ad copy or keywords, or even in naming conventions for campaigns and ad groups.
Append text is especially helpful if you need to append URL tracking parameters to a URL or entity name.
Change capitalization allows you to change to title case, sentence case, or all lower case.
Change URLs is a great tool that allows you to set URLs, append text to URLs, or remove a URL parameter.
Important Reminders
Whew! I hope by now you can see the power of Google Ads Editor. There are so many things you can do with it.
Here are a few important things to remember when using Google Ads Editor.
Before beginning an Editor session, be sure to get recent changes!
Remember, Google Ads Editor is an offline editor. It won’t know if changes were made to your Google Ads account by you or others in the online UI unless you get recent changes:

Google is pretty good about calling attention to the Get recent changes button to remind you, as seen above. Still, make a habit of always clicking this as soon as you open the app, no matter what.
Don’t forget to post any changes you’ve made before closing the Google Ads Editor app. I’m sure every PPC manager has forgotten to do this at least once and then wondered why the changes weren’t live in their account.
You’ll still want to work in the online UI for many tasks.
Editor won’t replace reporting, viewing graphs, checking billing, and many other features available in the online UI.
Use both Google Ads Editor and the online UI for maximum efficiency.
Editor has a lot of annoying error messages that aren’t “fatal” errors.
Seeing a bunch of yellow exclamation error messages in Google Ads Editor can be unnerving.
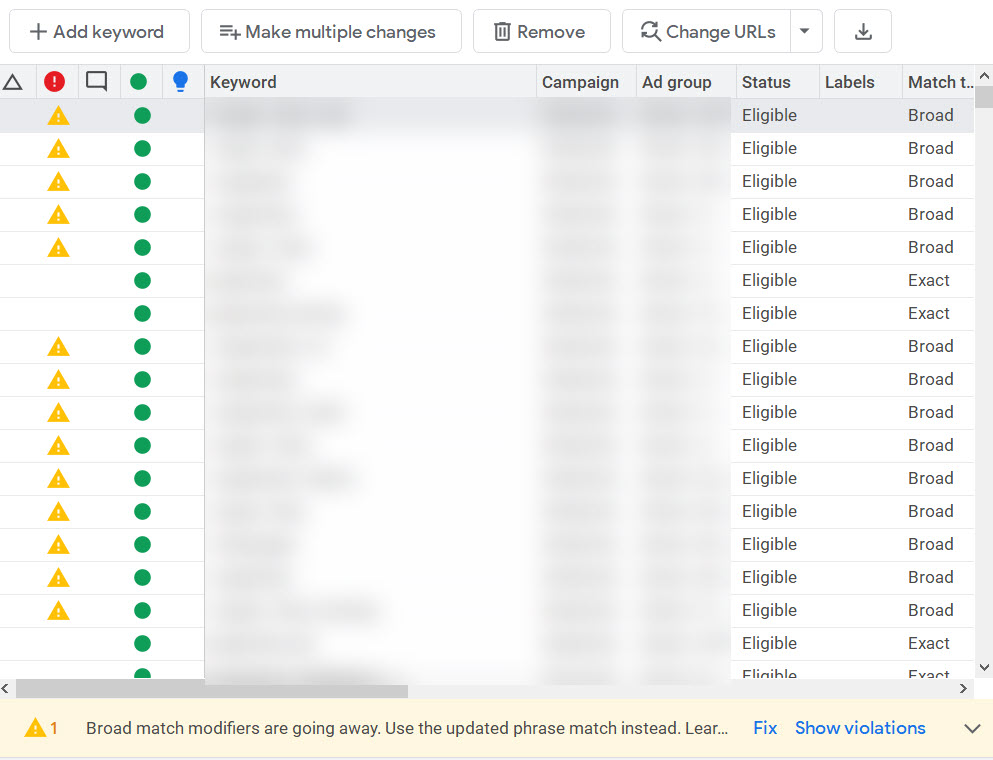
Think of these less like “errors” and more like “reminders.”
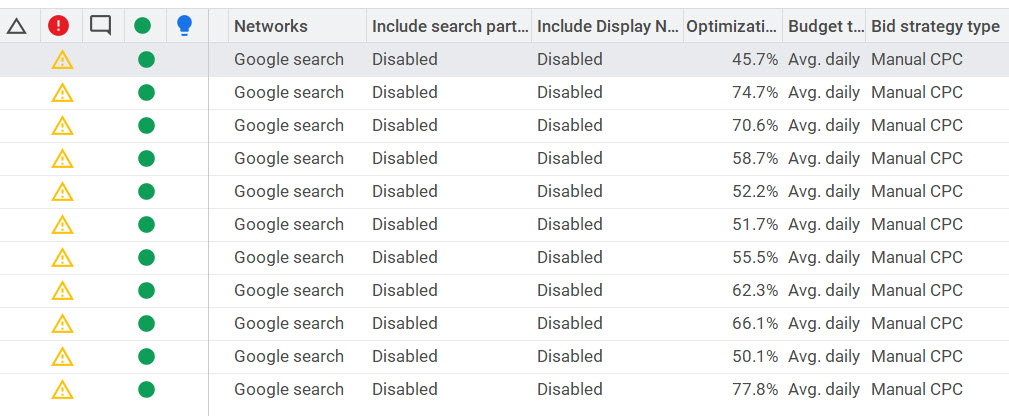
This example is in an account that makes extensive use of modified broad match. It’s a large account where we haven’t switched everything over to phrase match yet.
It’s good to have the reminder to make the switch but seeing a bunch of exclamation points can be scary.
Note that red error messages are indeed fatal errors that will need to be fixed immediately.
Now that you understand how to use Google Ads Editor, I hope you make it a regular part of your PPC management workflow.
More Resources:
- 7 Powerful Benefits of Using PPC Advertising
- 8 Simple Google Ads Tips That Will Make You More Money
- PPC 101: A Complete Guide to PPC Marketing Basics
Featured image: Iconic Bestiary/Shutterstock
