


Chatbots, infobots, socialbots, salesbots, superbots! Bots are a great way to help serve your customers, build your business, and cut down costs.
But how do you get started?
Like most other things, the best way is to start with something simple, get comfortable with the process, and then expand your skills and functionality.
Today we’re going to build a bot, step-by-step, starting with a simple informational bot based on a template create by Microsoft (my employer). Informational bots make it easy for you to quickly get information via simple text-based chat.
In this how-to, we’ll create a bot to answer questions defined in a knowledge set or FAQ using QnA Maker and displayed in a Cortana bot using Azure Bot Service.
The best part: it will take 30 minutes or less! And, it requires no coding skills!
First things first, set up free accounts on Microsoft (Microsoft will ask for name, DOB, email) and Azure (Azure also asks for a credit card, but only for ID verification, no charges unless you upgrade). Also, be sure you accept third-party cookies to avoid hang-ups in the process.
Now, let’s start to build our bot.
Step 1: Create a QnAMaker Service
A QnAMaker service consists of a knowledge base created from one or more sources, such as an FAQ URL or a document that contains the question and answer pairs.
Navigate to QnAMaker.
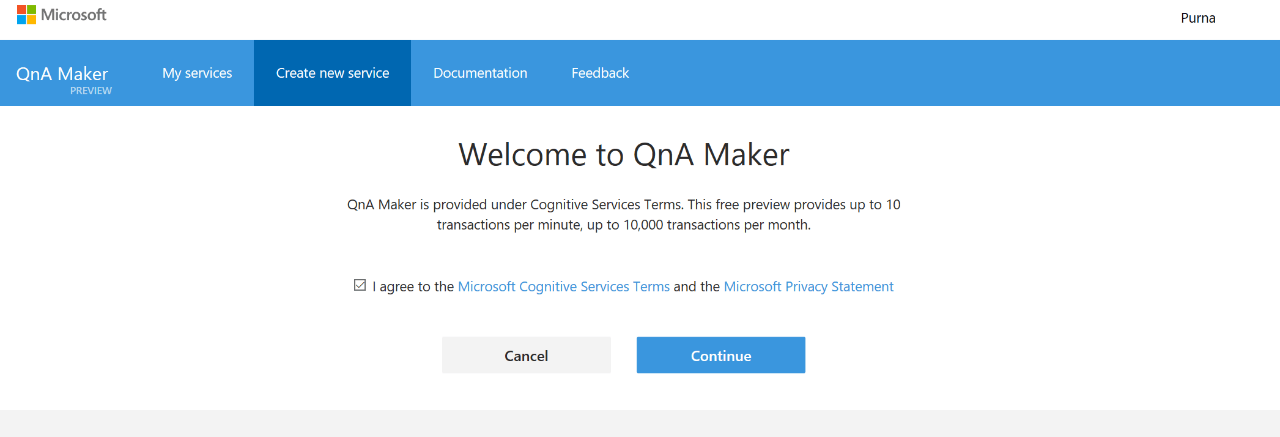
Click on Create new service from the top menu.
Agree to terms of service. (Click the box.) Select Continue.
Create a name and choose your source materials.
You might want to start with a URL that is already populated with FAQs. Or you can upload a file or even enter Qs and As manually.
For now, we’ll input a URL for our service we’ve named Purna_Test_Bot.
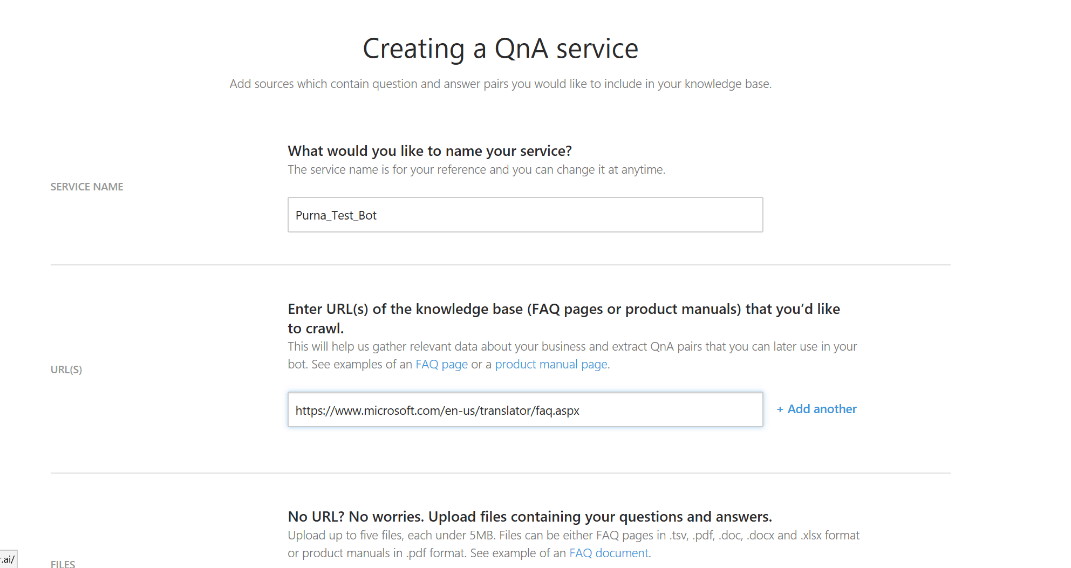
Hit Create and wait just a few minutes (or maybe only a minute).
Voila! You have created a QnA knowledge base. It will show up as a two-column question and answer table.
Let’s see what we have.
Step 2: Explore the Knowledge Base
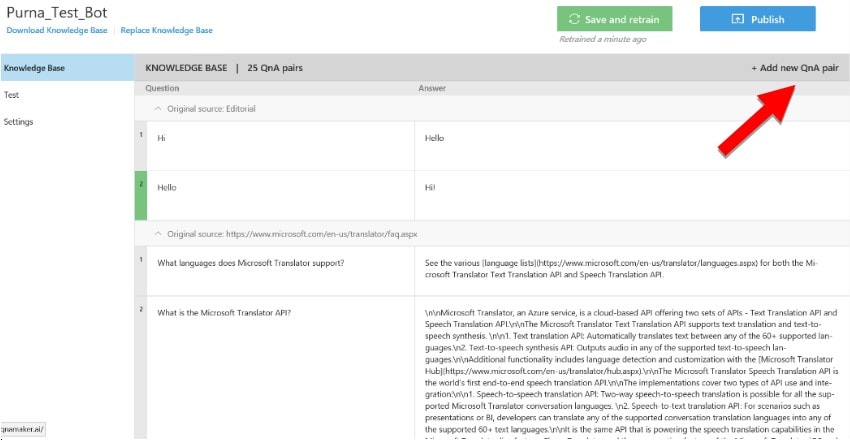
The QnA service has already loaded your FAQs into the two-column knowledge base, without any extra tweaking needed from you. (See several items at the bottom of the list below.)
It also starts with a sample greeting “Hi” with the response “Hello.”
Now you can add “editorial” content.
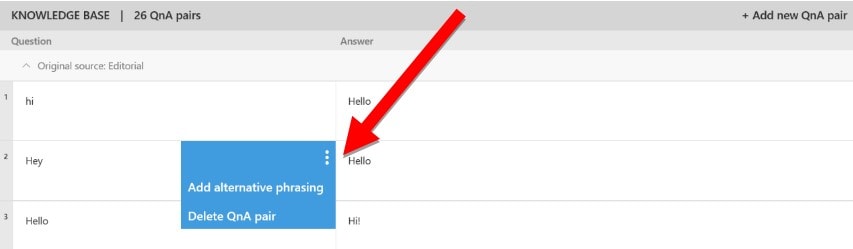
Select Add new QnA pair to input other greetings and responses. Here I’ve entered the opposite pair: “Hello” and “Hi.”
Very simple, yes?
Be creative when testing the process. Input other editorial pairs. You can even add alternate phrasing by clicking on the three dots in one of the input boxes and adding content.
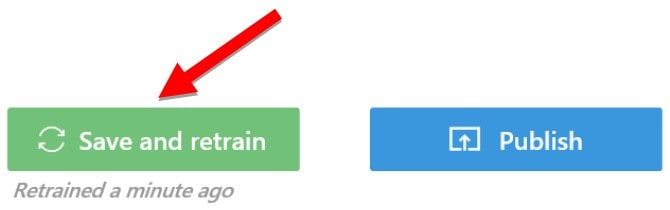
After you have played with this for a while, select Save and Retrain to update the model.
Don’t worry, you can always go back and make adjustments by deleting or adding new pairs.
Remember this is AI, always ready for updates.
If you want, you can download the knowledge base you’ve created.
Select Download Knowledge Base and you will get a tabbed, separated .tsv file.
Open it and save it to Notepad. (This step is optional.)
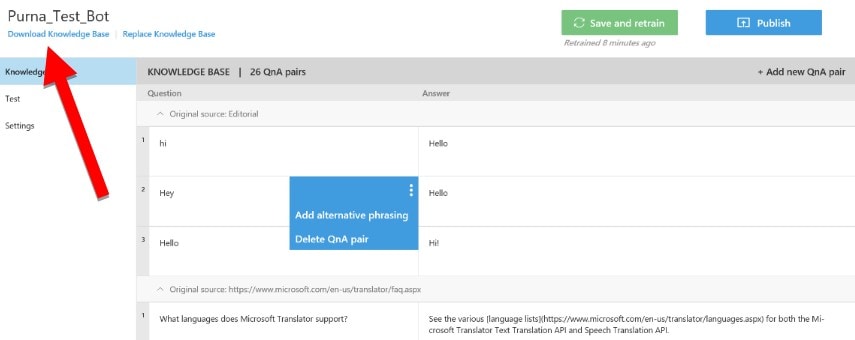
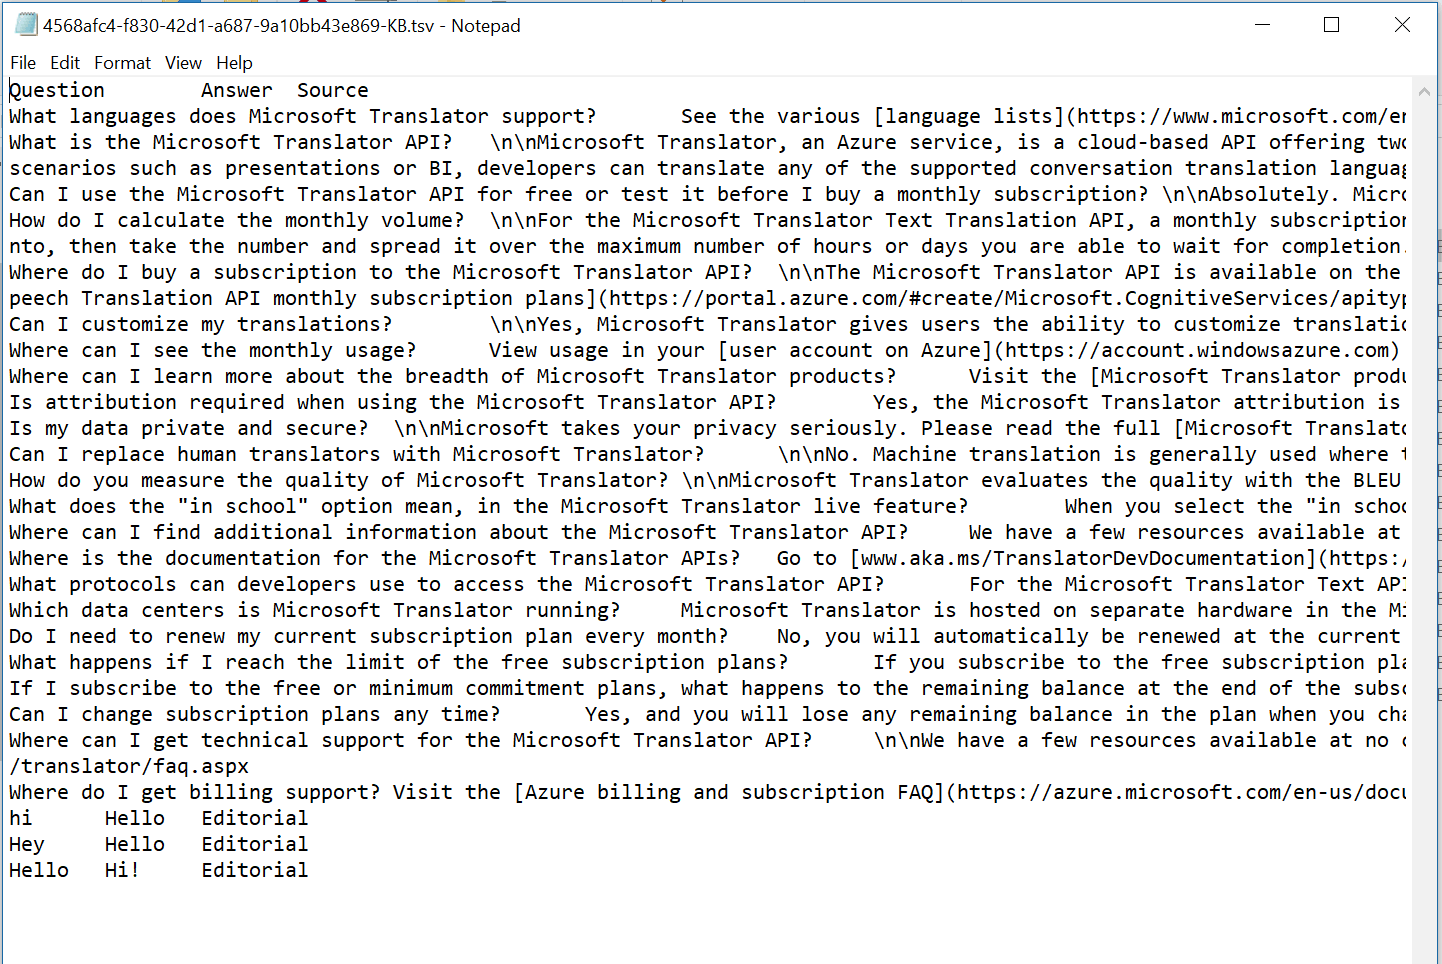
Mine looks like this.
Some of you might like working with this type of file offline. If so, go for it.
Make changes and save your file.
Select Upload updated knowledge base.
Click on Replace Knowledge Base.
Browse for the BotAnswersKnowledgBase.tsv file that you saved in the previous step.
Confirm that you want to replace your knowledge base.
That’s it, success! It really did work for me the first time.
However, no IT person worth his or her bits and bytes stops here. We must have some verification.
Step 3: Test the Knowledge Base
This is the fun part (actually it’s all kind of fun). You get to train yourself in understanding how the knowledge base responds to what might happen in the real world.
You don’t have to invent anything here. QnAMaker includes a built-in test tool that simulates a chatbot experience.
Open your knowledge base (it may already be open if you’re following along) and select Test on the left.
The test tool looks and behaves like a simple web-based chatbot.
Enter the greetings you added to the knowledge base in the previous exercise. You should see the paired responses you entered.
Neat, huh?
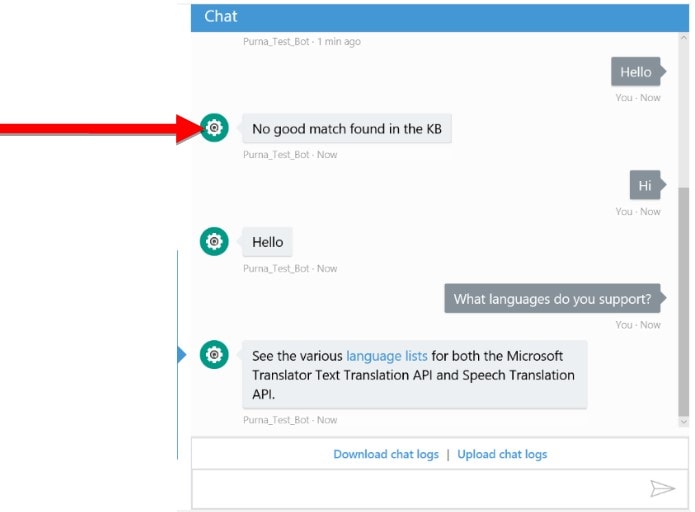
Now try an entry that you didn’t include when you built the knowledge database.
You may see the response “No good match found in the KB.”
This is a great tool. It helps you spot potential errors and prevent them before a real customer is the user.
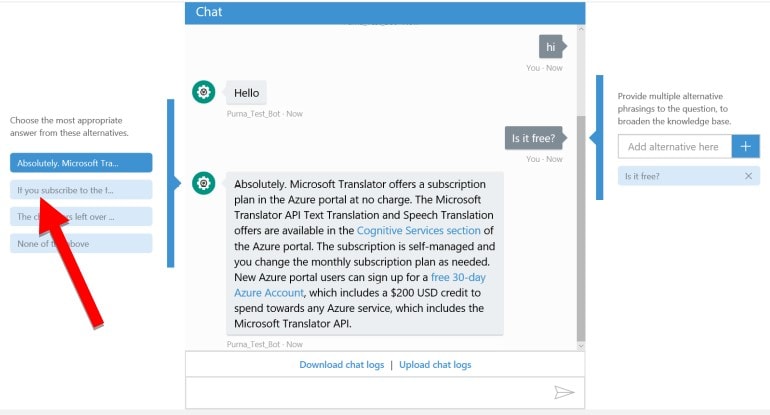
Notice that you can test both the editorial pairs and the FAQ pairs.
If you want to correct errors, you can frame multiple questions as alternative paths to drive to the answer in your FAQs.
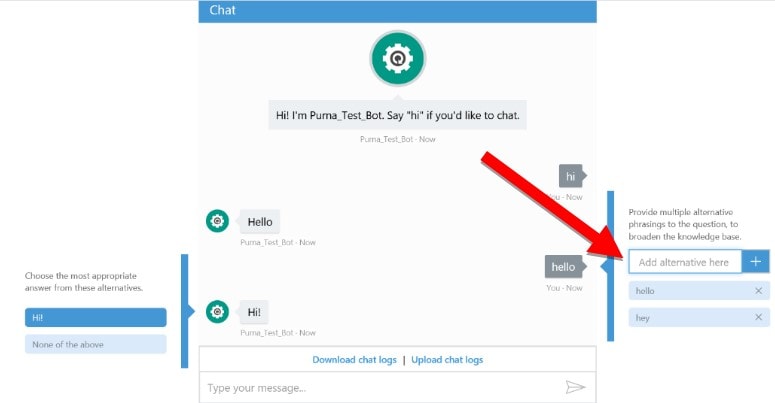
Save and retrain (often).
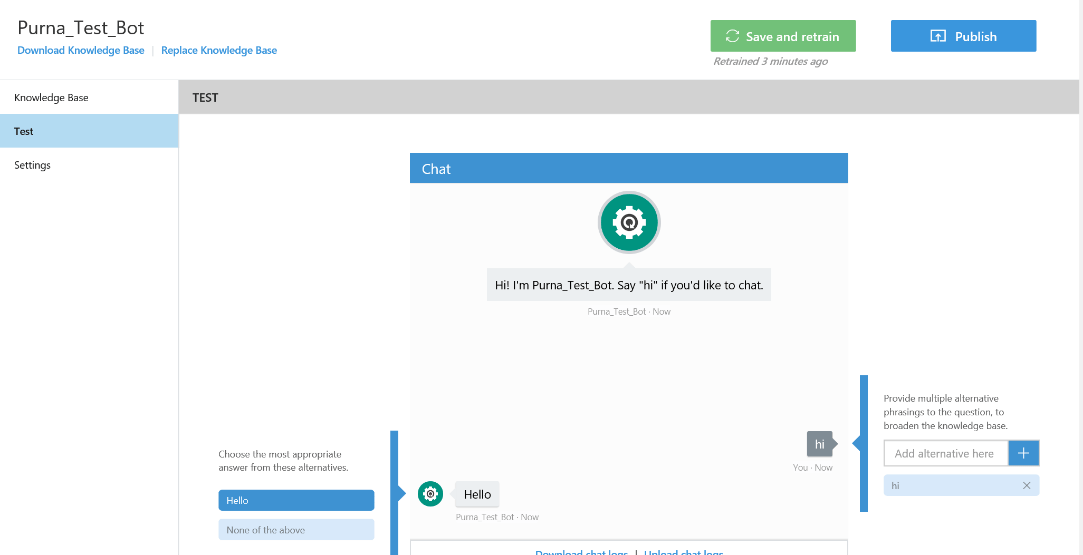
Let’s do some more checking. Your knowledge base may offer several alternative responses for a specific user inquiry. You can train the bot by selecting the most appropriate response (or tweaking to provide a new alternative).
This is actually a lot like training human call center operators to respond correctly to varied questions. Most likely the bot will be faster and more consistent.
After doing all this, save and retrain. You are ready to go to press!
Step 4: Publish Your Knowledge Base
So far you’ve been dabbling. Now you’re ready to go legit.
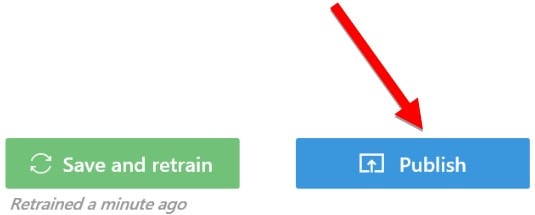
You’ve seen this screen many times for Save and retrain. This time select Publish.
A confirmation page shows you details of your knowledge base. It lists all the sources and how many question and answer pairs are in each section and in production.
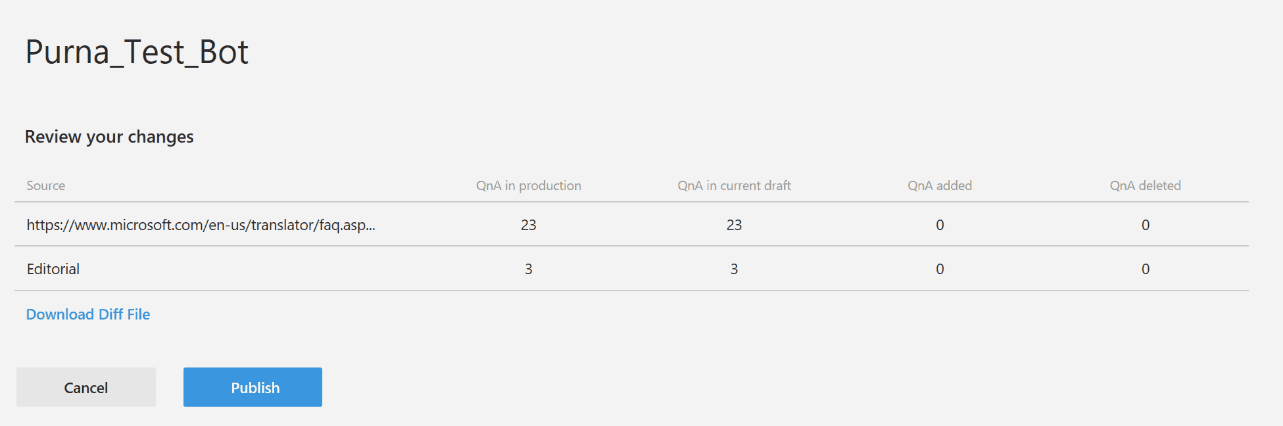
Hover over that Publish button for a moment and then click it…Success!
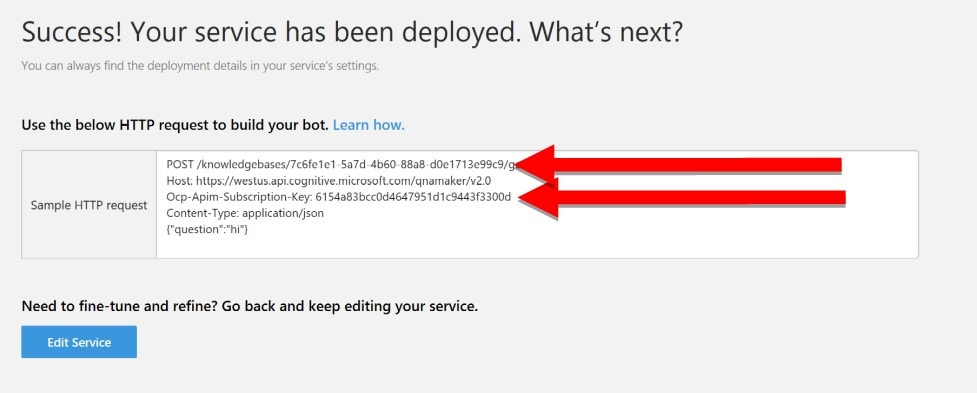
The success screen gives you two important pieces of information within the sample REST call to your newly published knowledge base. Here you can see the ID for your knowledge base and the ID for your subscription key.
(Note that this information is always available at your QnAmaker.ai Home/MyServices page by clicking View Code for the desired bot.)
Step 5: Update Resources
If you’re just having so much fun with this process you can go back and do more editing with Edit Service.
For example, from the Settings button, try adding other resources (files or manual) or deleting content. You will to “share,” adding subject matter experts to curate the questions and answers.

Now you’re ready to connect with the world.
Step 6: Create an Informational Bot with Azure Bot Service
If you create a bot but no one can interact with it, does it really exist? (That’s just a philosophical thought question.)
The bot doesn’t do much until we prepare it to communicate with others.
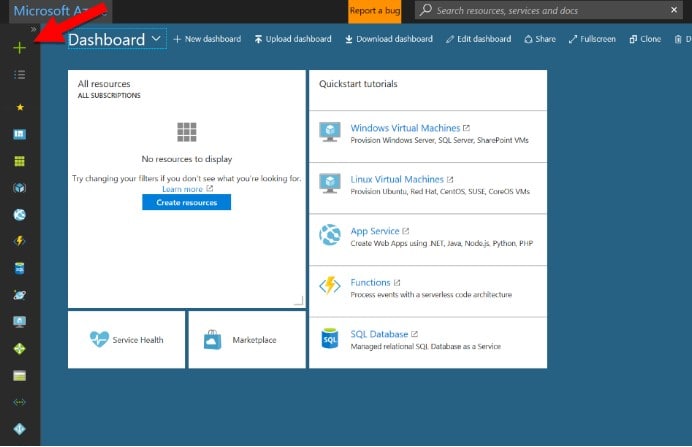
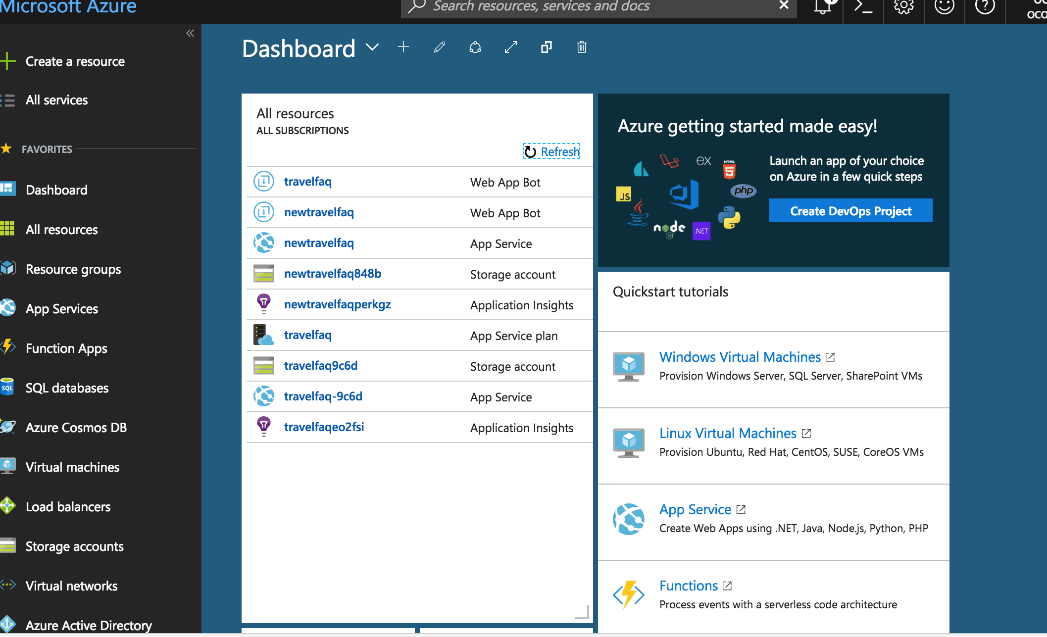
Navigate to Azure (portal.azure.com). If you didn’t already set up your account as a prestep, do it now. This will bring you to your dashboard.
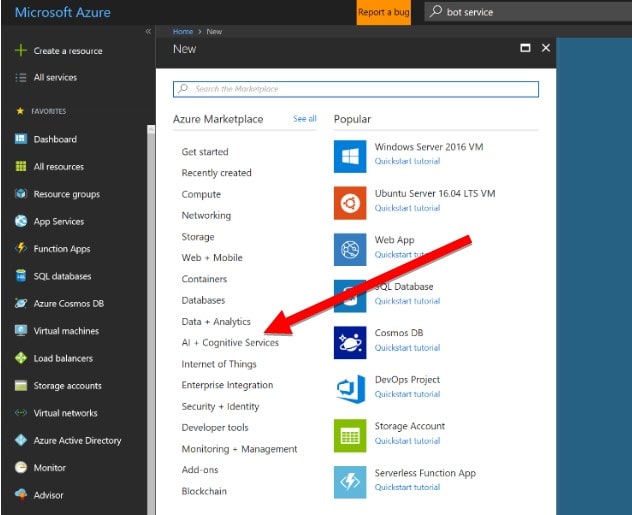
View some of the Quickstart tutorials or select the + to Create a Resource and start on your bot service activation.
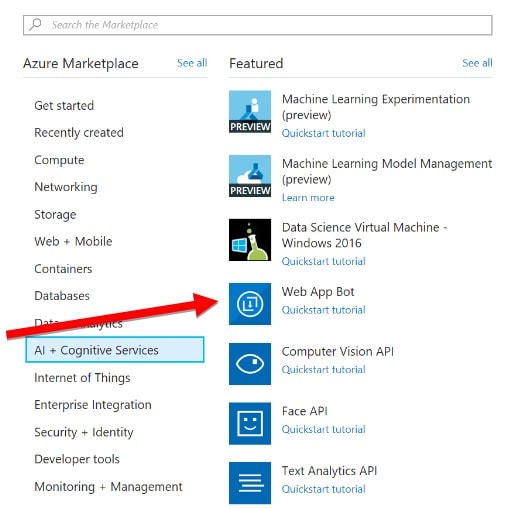
Here we select AI and Cognitive Services.
And then Web App Bot.
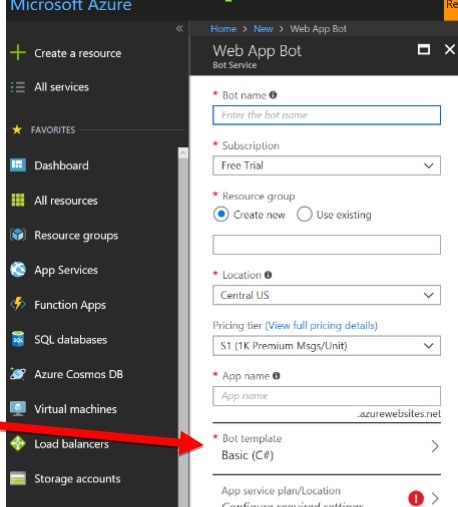
Now we’ll start entering the Bot Service details. You can choose the defaults after you enter a bot name.
- Enter a unique name for your bot. (This will trigger app name and azure storage name in appropriate fields.)
- Choose a valid subscription. I’ve started with “Free Trial.”
- Create a new resource group. It will default to the same name as your app bot name.
- Use the default pricing tier.
- Choose the bot template. (Default is “basic” but we will select Q and A on the next page.)
- Select App Service plan/Location
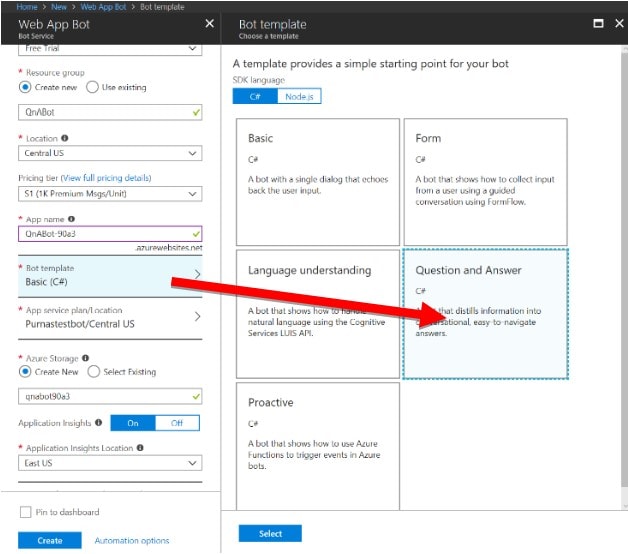
Some of these will give you pop-ups to enter from predefined selections. This is how the bot template field brought us to a pop-up to select “Question and Answer” for our service.
(Choose Question and Answer and then hit Select to return to the details page.)
One final detail is very important to marry our knowledge base to this service.
Select option to Autocreate Microsoft ID and password.

Now when you hit Create, you will come back to the Dashboard and see your web app bot. (Please trust me here. I switched between Purnatestbot and newtravelfaq for some of the next screens in the demo.)
Select your new bot, and scroll to Application settings.
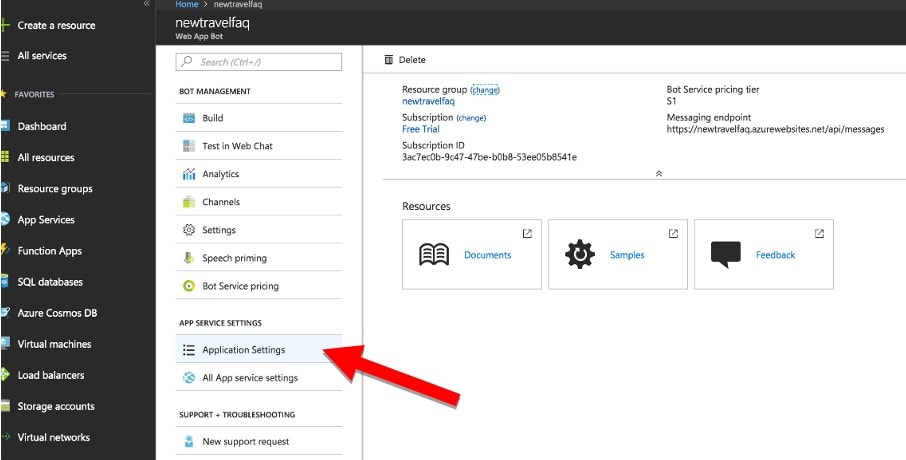
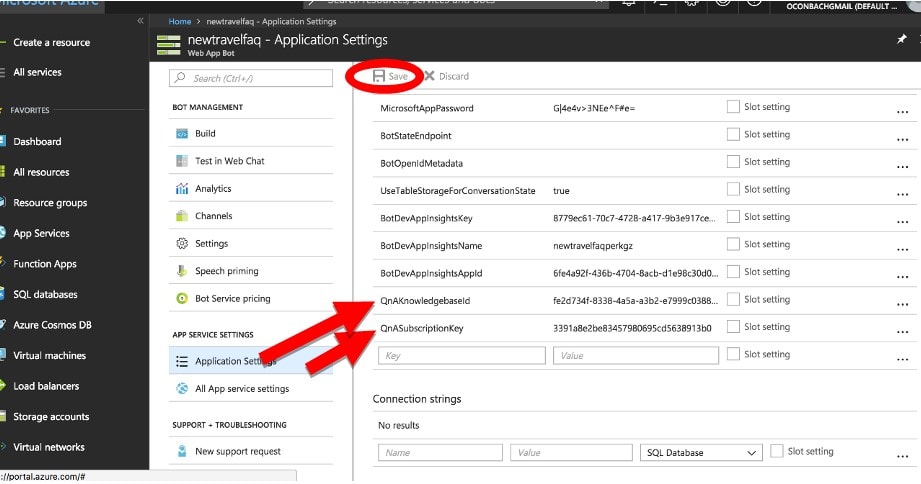
This will bring you to the two spots to copy and paste the QnA knowledge base ID and subscription key that you created in Step 4.
Very important: Select Save at the top of the page. We are now live!
There is a lot more we can do with this.
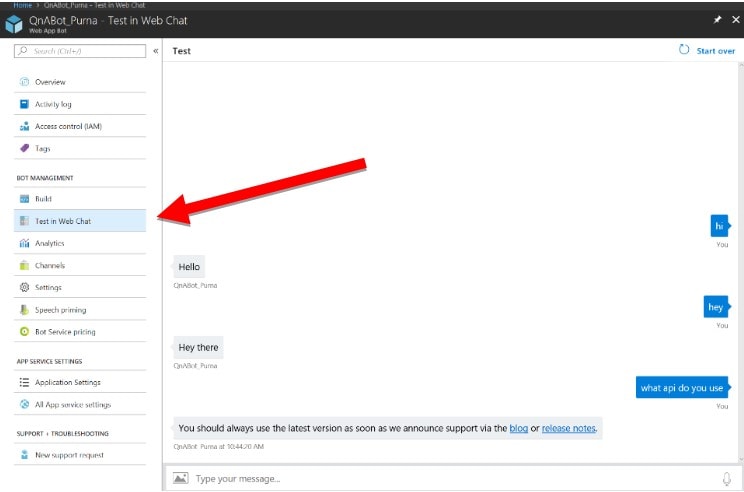
Let’s return to the main bot page for some testing.
Select Test in Web Chat. Here we’re entering a few of the editorial greetings and some questions for the FAQs. This shows our responses as we set them up in QnAMaker. (It works!)
If we select Build, we can choose how to work with the code and enable a source code provider.
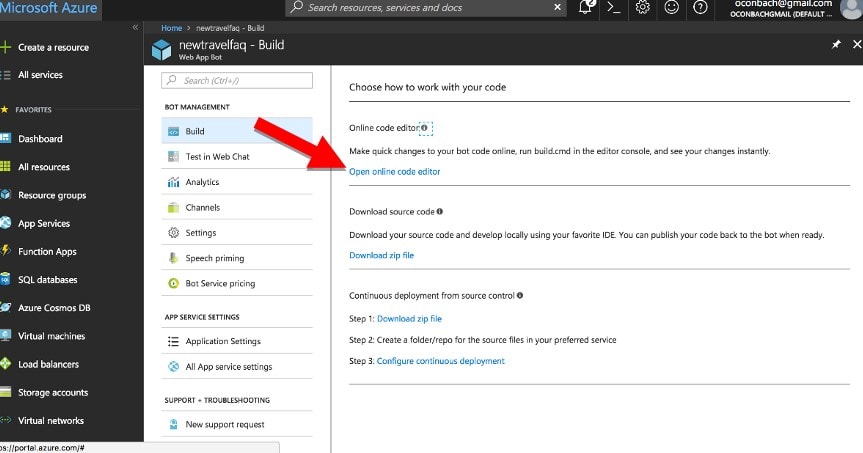
When we click Open online code editor, we can select Dialogs and…
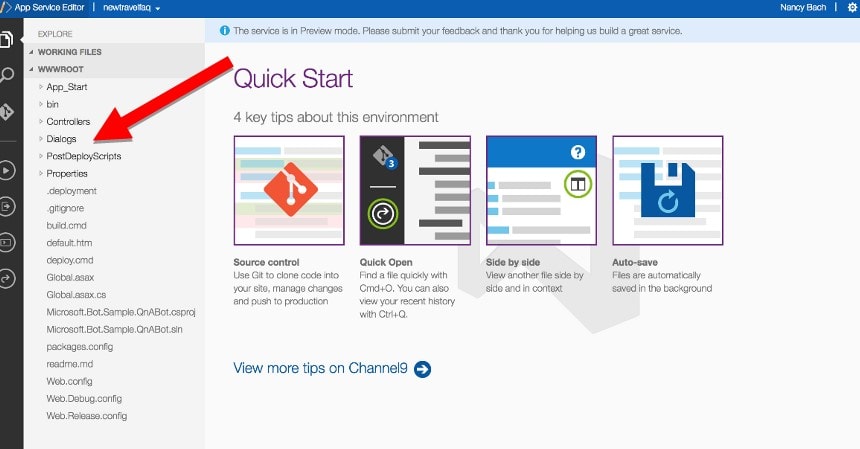
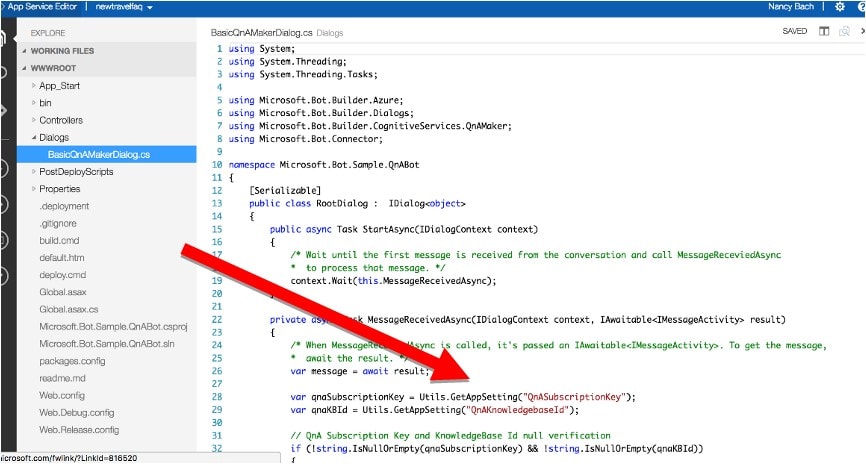
Here we see the actual code that marries our knowledge base with the bot service. All we had to do was drop in our ID and key and voila! Our own bot!
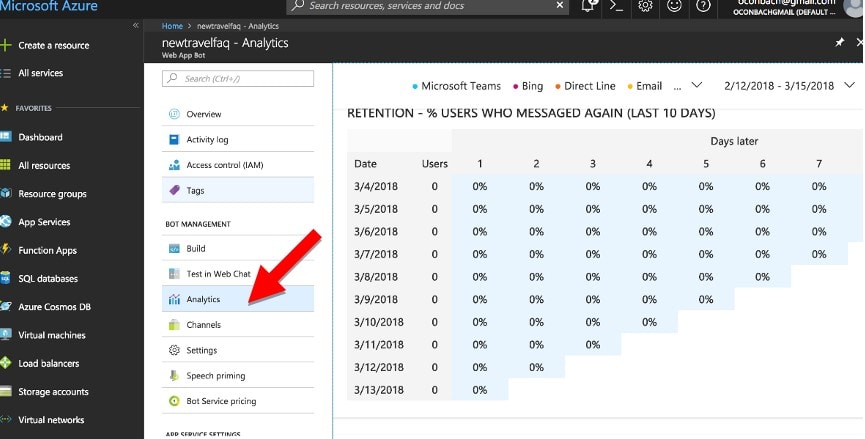
More functionality…Check analytics.
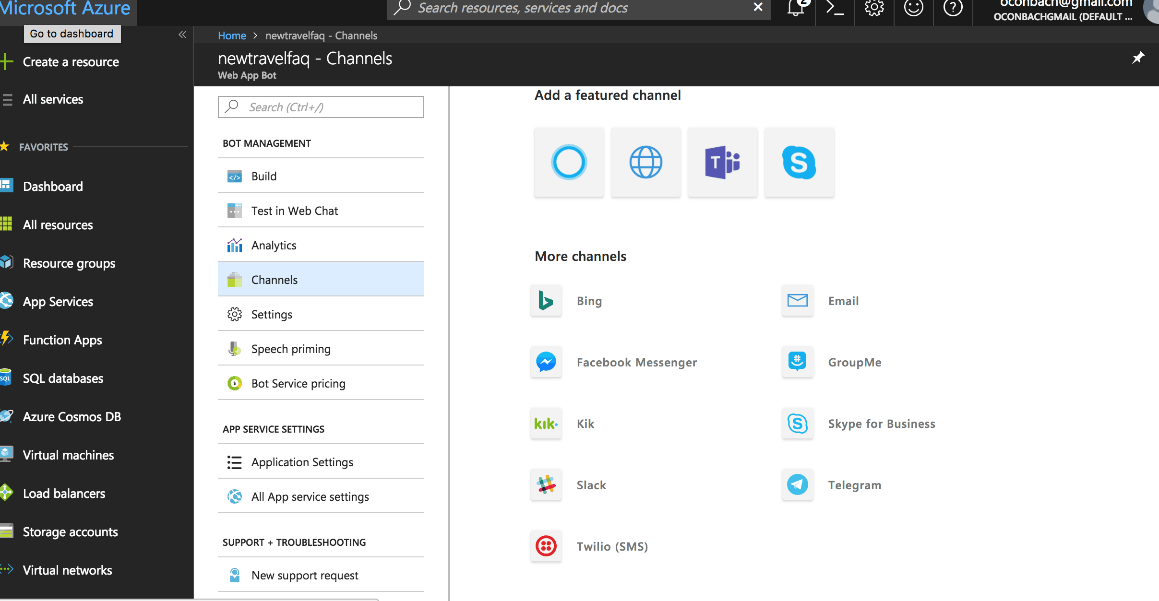
The last step is to connect to channels. WebChat is the default, but we can add other favorites.
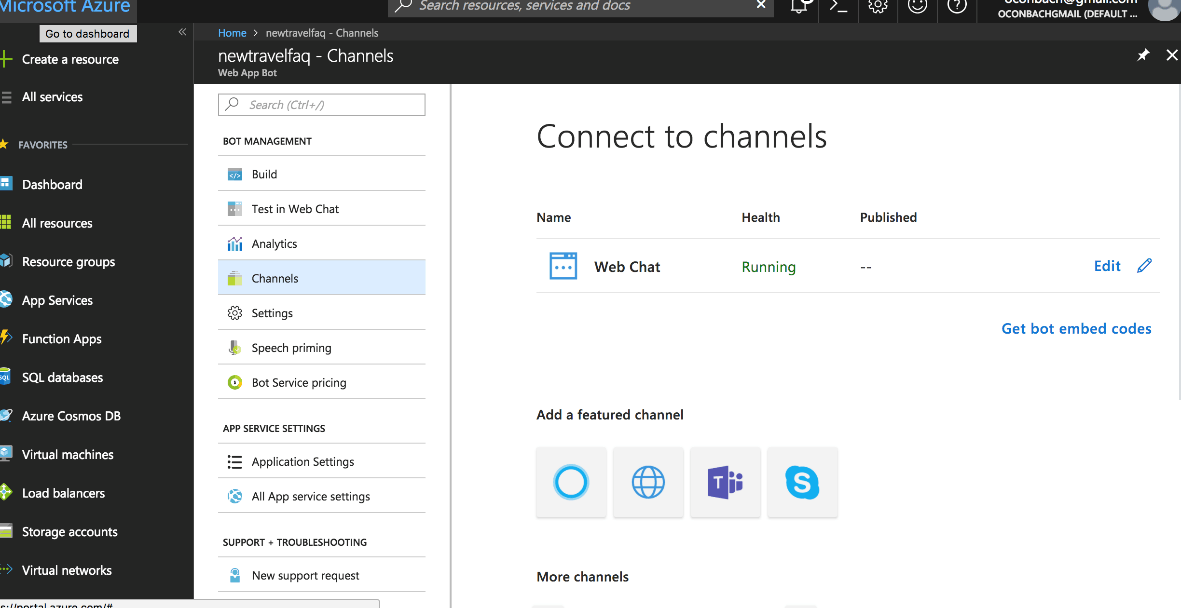
After this last step, you can see the process at work. Put a question into webchat and marvel at the results you get.
I’ve demonstrated this process with QnAMaker and Azure and it worked great. I had similar results when I tried the WYSIWYG platform Mobile Monkey. Both were successful and both were very easy. Try it.
With a 30-minute time investment, you can create your own bot and enjoy bot-topia!
More Chatbot Resources:
- What the Heck Is a Chatbot & How Can It Improve Your PPC Strategy?
- Bing Makes it Easier to Find Chat Bots
- How to Integrate AI Into Your Digital Marketing Strategy
Image Credits
All screenshots by Purna Virji. Taken May 2018.
